
Electric bike LCD displays are vital interfaces, showing crucial data like speed and battery life.
Understanding these displays enhances your riding experience and helps diagnose potential issues, ensuring safe operation.
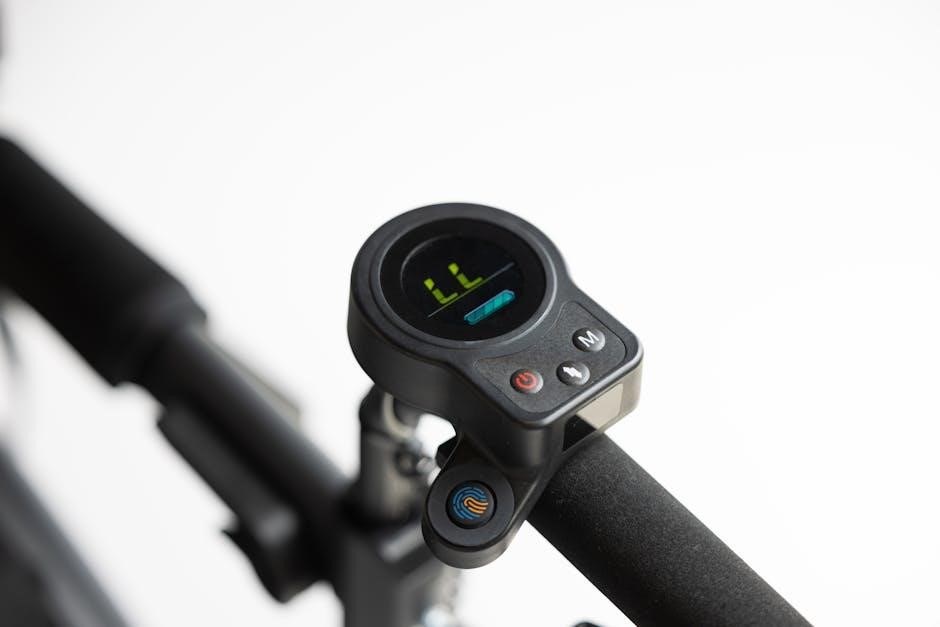
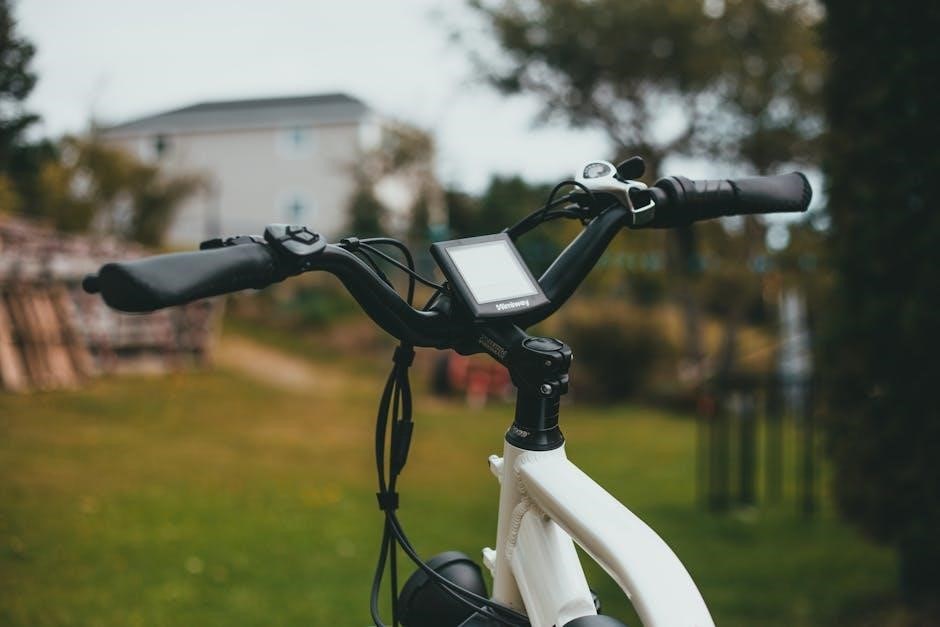
What is an E-Bike LCD Display?
An E-Bike LCD display is a digital interface mounted on your electric bicycle’s handlebars. It serves as the central hub for monitoring and controlling the bike’s electrical system. These displays present real-time information, including speed, battery charge level, pedal assist settings, and distance traveled.
Modern displays often incorporate features like fault code indicators, providing diagnostic information when issues arise. They are essential for understanding the bike’s performance and ensuring a safe and enjoyable ride. Basic displays show core data, while advanced models offer customization options.
Importance of Understanding Your Display
Comprehending your E-Bike LCD display is crucial for maximizing your riding experience and maintaining bike health. Knowing how to interpret the displayed information allows you to efficiently manage battery usage, optimize pedal assist levels, and monitor your speed.
Furthermore, recognizing fault codes and error messages enables prompt troubleshooting, potentially preventing more significant mechanical issues. A clear understanding empowers riders to make informed decisions, ensuring safety and extending the lifespan of their E-Bike’s components.
Common E-Bike LCD Display Information
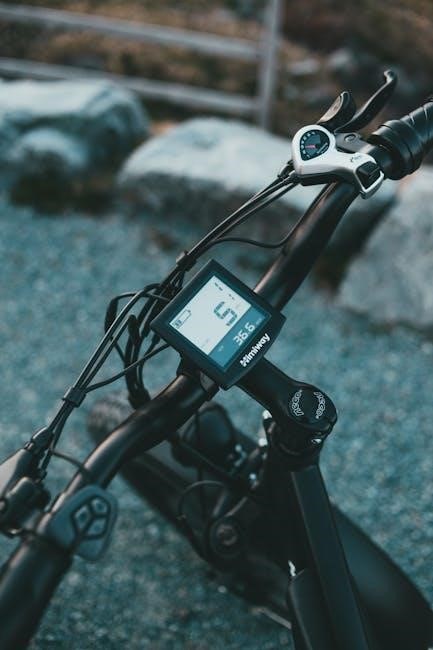
Typical E-Bike displays present speed, battery level, pedal assist, distance traveled, and error codes. These key metrics provide essential ride data at a glance.
Speed Display
The speed display on your e-bike’s LCD screen is a fundamental feature, typically showing your current riding speed. This is often presented in either miles per hour (MPH) or kilometers per hour (KMH), depending on your display settings. Accurate speed monitoring is crucial for adhering to local traffic laws and ensuring a safe riding experience.
Many displays also feature a maximum speed reached indicator, providing insight into your performance. Remember that displayed speed can sometimes vary slightly due to wheel size calibration or sensor inaccuracies. Regularly check and adjust your wheel size settings for optimal speed readings.
Battery Level Indicator
The battery level indicator is arguably the most critical display element, showing remaining battery capacity. This is usually represented as a percentage or a series of bars depleting as the battery discharges. Monitoring this indicator prevents unexpected power loss during your ride.
Keep in mind that the displayed percentage isn’t always perfectly accurate, especially under heavy load or in cold temperatures. It’s wise to factor in a safety margin and recharge before the battery is completely drained to prolong its lifespan;
Pedal Assist Level (PAS)
The Pedal Assist System (PAS) level, displayed on your LCD screen, controls the amount of motor assistance you receive while pedaling. Typically ranging from 0 to 5 (or sometimes higher), each level offers a different degree of support.
Level 0 means no assistance, while higher levels provide more power with less pedaling effort. Adjusting the PAS level allows you to customize your ride, conserving battery or tackling challenging terrain with ease.
Distance Traveled (Trip & Odometer)
Your e-bike LCD display usually tracks two types of distance: Trip and Odometer. The Trip meter resets after each ride, showing the distance covered during that specific journey. This is useful for monitoring individual rides and planning routes.
The Odometer, however, accumulates the total distance traveled throughout the bike’s lifespan. It’s a valuable metric for tracking maintenance intervals and overall usage.
Fault Codes & Error Messages
E-bike LCD displays often present fault codes or error messages when issues arise. These codes are the bike’s way of communicating problems with components like the motor, battery, or controller.
Consult your e-bike’s manual to decipher these messages; they provide clues for troubleshooting. Common issues indicated include communication errors, sensor failures, or over-voltage/current situations. Ignoring these warnings can lead to further damage, so prompt attention is crucial.
Troubleshooting a Non-Responsive Display
A non-responsive display often stems from simple issues; Begin by verifying the battery charge and checking all cable connections for looseness or damage.
Basic Checks: Battery Charge
Ensuring a fully charged battery is the first step in diagnosing a display issue. A low battery can sometimes provide insufficient power to operate the LCD screen, even if other bike functions seem normal.
Connect the battery to a known working charger and allow it to charge completely. After charging, attempt to power on the display again. If the display remains unresponsive, proceed to check the connections, as a faulty connection could still be the root cause. Remember, a simple recharge can often resolve the problem!
Checking Connections
Inspect all wiring connected to the LCD display and the bike’s controller. A loose connection is a common culprit for a non-responsive display. Gently wiggle each connector to see if it feels secure.
Pay close attention to the connectors themselves; look for any signs of corrosion or damage. Ensure they are fully seated and locked into place. If issues persist, carefully disconnect and reconnect each connector to ensure a clean, solid connection. A secure connection is crucial for proper display function.
Loose Wiring
Loose wiring frequently causes display malfunctions. Carefully trace the wires from the display to the controller, checking for any disconnections or frayed wires. Gently tug on each wire at the connection points to assess its security.
Even a slightly loose connection can interrupt the signal. Secure any loose wires with electrical tape or zip ties, ensuring they don’t interfere with moving parts. Prioritize a thorough inspection of all wiring harnesses for optimal performance.
Connector Issues
Connector issues are common culprits when an e-bike display fails. Examine the connectors at both the display end and the controller end for corrosion, dirt, or bent pins. Disconnect and reconnect each connector several times to ensure a solid connection.
If corrosion is present, carefully clean the connector pins with a contact cleaner. Inspect the connector housings for any cracks or damage. A damaged connector may require replacement to restore reliable communication.
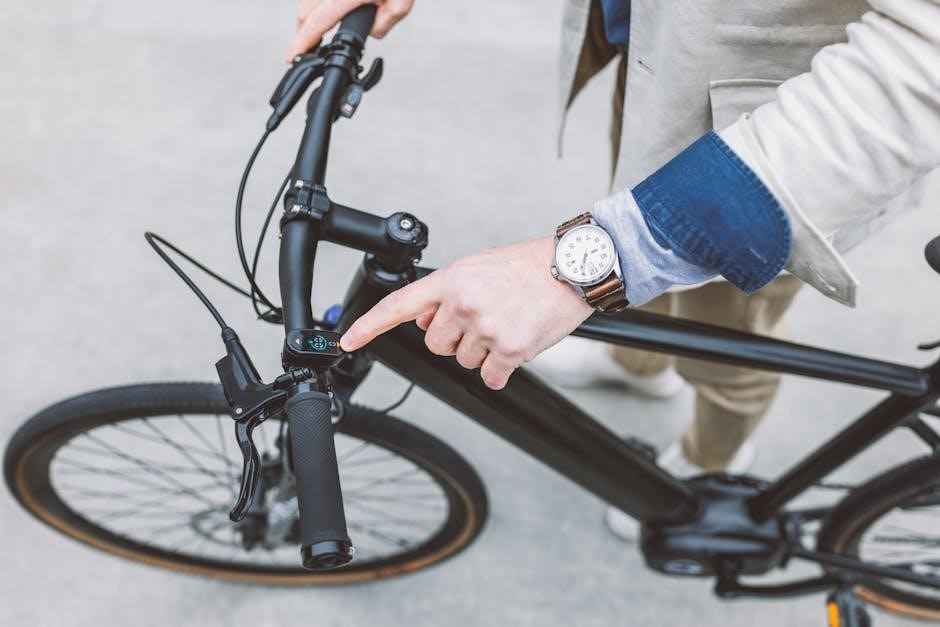
Powering On/Off Sequence
Proper powering on/off is crucial for display functionality. Always ensure the bike is completely stationary before manipulating the display or power settings. Begin by using the designated power button, typically located on the display itself or near the handlebars.
A complete power cycle involves turning the entire e-bike system off, not just the display. Observe the display for a clear indication of power-down, and then restart to test responsiveness.
Resetting Your E-Bike Display
Resetting the display often resolves glitches. Always come to a complete stop, power down the e-bike, and disconnect the battery for a safe, effective reset.
Complete Stop Requirement
Prioritizing safety is paramount when dealing with your e-bike’s display. Attempting a reset or altering settings while in motion is incredibly dangerous and strongly discouraged. A stable, stationary position ensures accurate adjustments and prevents accidental control loss.
The e-bike must be brought to a complete standstill before initiating any reset procedure. This eliminates the risk of unexpected behavior from the system during the process. Remember, manipulating electronic components while riding compromises your control and could lead to accidents.
Power Down Procedure
Completely switching off the e-bike system is a crucial step before attempting a display reset. Locate the main power button, typically found near the handlebars or battery mount. Press and hold this button until the entire system, including the display, shuts down.
Ensure all lights and indicators are off, confirming a full power cycle. This procedure prepares the system for a safe reset, preventing potential data corruption or component damage. A proper shutdown is essential for a successful and reliable outcome.
Battery Disconnection (Hard Reset)
For a comprehensive reset, disconnecting the battery is highly recommended. This eliminates all electrical current, creating a safe environment for the reset process. Carefully detach the battery from the e-bike frame, following the manufacturer’s instructions.
Allow several minutes for any residual charge to dissipate. Reconnecting the battery after this period ensures a truly “hard” reset, often resolving stubborn display glitches. This method is particularly effective when standard power cycles fail to restore functionality.
Potential Causes of Display Malfunction
Several factors can cause display issues, including low battery voltage, water damage, and controller problems. Loose connections also frequently contribute to a non-responsive screen.
Low Battery Voltage
Insufficient power is a common culprit when an e-bike display fails to illuminate. The LCD screen requires a minimum voltage to operate correctly; if the battery is significantly discharged, it may not provide enough power.
Always ensure a fully charged battery before troubleshooting a display issue. A simple recharge can often resolve the problem, restoring functionality to the screen. Regularly checking and maintaining your battery’s charge level is crucial preventative maintenance.
Consider that even a battery showing some charge might not deliver sufficient voltage under load, especially in colder temperatures, impacting display operation.
Water Damage
Exposure to water can severely compromise the functionality of your e-bike’s LCD display. While many displays have some level of water resistance, prolonged or direct exposure can lead to corrosion and short circuits.
If your display has been exposed to water, immediately power off the e-bike and disconnect the battery. Avoid attempting to turn it on until you’re certain all components are completely dry.
Corrosion within the display’s circuitry can cause permanent damage, necessitating replacement. Preventative measures, like covering the display during rain, are highly recommended.
Controller Malfunction
A malfunctioning controller is a significant cause of display issues, as the controller sends the data to the LCD screen. If the controller isn’t functioning correctly, it won’t transmit information, resulting in a blank or unresponsive display;
Symptoms include a complete lack of display activity, even with a fully charged battery and secure connections. Diagnosing a controller issue often requires professional assistance, as it involves testing the controller’s internal components.
Replacing a faulty controller is often necessary, and it’s crucial to ensure the replacement is compatible with your e-bike’s system.
Display Settings & Customization
Many LCD displays allow personalization! Adjust brightness for optimal visibility, switch between MPH and KMH units, and calibrate wheel size for accurate readings.
Adjusting Brightness
Brightness control is a common feature on e-bike LCD displays, allowing riders to optimize visibility in varying light conditions. Typically, you’ll find brightness settings within the display’s menu, accessible via button combinations – consult your specific display’s manual for details.
Increasing brightness enhances readability in direct sunlight, while decreasing it conserves battery power and reduces glare at night. Experiment to find a comfortable level for different environments. Some displays offer automatic brightness adjustment based on ambient light sensors, providing a convenient, hands-free solution.
Unit Selection (MPH/KMH)
E-bike displays often allow customization of units for speed, distance, and potentially other metrics. Switching between miles per hour (MPH) and kilometers per hour (KMH) is a frequent adjustment. This setting is usually found within the display’s menu system, accessed using the control buttons.
Refer to your display’s manual for the precise button sequence to enter the settings and change the unit preference. Ensuring the correct units are selected provides accurate readings and a more intuitive riding experience, tailored to your regional preferences or personal needs.
Wheel Size Calibration
Accurate wheel size calibration is crucial for precise speed and distance readings on your e-bike’s LCD display. Incorrect calibration leads to inaccurate data, affecting trip calculations and overall ride experience. The calibration process typically involves entering your wheel’s diameter in millimeters into the display’s settings menu.
Consult your e-bike’s manual or the display’s documentation for the specific steps. Correctly setting the wheel size ensures the display accurately reflects your speed and distance traveled, providing reliable information during each ride.
Finding Replacement Displays
Replacing a faulty display is often straightforward; platforms like Aliexpress offer numerous compatible options. Identifying the correct model ensures seamless integration and functionality.
Aliexpress as a Source
Aliexpress presents a vast marketplace for sourcing replacement e-bike LCD displays, offering competitive pricing and a wide selection of models. When navigating the platform, carefully review product specifications and seller ratings to ensure quality and compatibility.
Pay close attention to voltage and connector types, comparing them meticulously with your original display. Utilize the search filters to narrow down options based on your e-bike’s brand and model.
Don’t hesitate to contact the seller directly with any questions regarding compatibility or functionality before making a purchase. Remember to factor in shipping times, which can vary significantly.
Identifying Compatible Displays
Determining display compatibility is crucial for a successful replacement. Begin by noting the voltage of your current display – typically 36V, 48V, or 52V.
Carefully examine the connector type; it must match the wiring harness of your e-bike controller. Look for identifying numbers or model codes printed on the existing display’s circuit board.
Consult your e-bike’s manual or manufacturer’s website for specific display recommendations. If unsure, provide the display’s model number to potential sellers for verification before purchasing.

Understanding Fault Codes
Fault codes on your e-bike display signal potential problems. Interpreting these messages—often numerical—is key to diagnosing issues, ranging from motor errors to battery faults.
Common Error Code Meanings
Decoding error codes is crucial for effective troubleshooting. A “21” or “22” often indicates a communication error between the controller and display, potentially stemming from loose connections.
Codes relating to the motor, like “05”, suggest a motor phase issue or wiring problem. Battery-related errors, such as low voltage warnings, are frequently displayed as “10” or similar.
Remember, specific codes vary by manufacturer; consulting your e-bike’s manual is always recommended for accurate interpretation and resolution steps.
Interpreting Display Messages
Beyond error codes, displays present messages indicating system status. A flashing battery icon signifies low charge, prompting immediate recharging. “POWER UP” or similar prompts confirm successful system activation.
Pay attention to warnings like “OVER SPEED”, indicating you’ve exceeded the e-bike’s speed limit.
Understanding these messages allows proactive maintenance and prevents potential damage. Always refer to your e-bike’s manual for a comprehensive list of display indicators and their meanings.
Preventative Maintenance
Regularly inspect cable connections and shield the display from water exposure. Secure connections prevent malfunctions, while protection from the elements extends its lifespan considerably.
Protecting from Water Exposure
Water damage is a significant threat to your e-bike’s LCD display, potentially causing corrosion and short circuits. Avoid direct exposure to rain, puddles, and washing the bike with a high-pressure hose. Consider using a protective screen cover during inclement weather or when riding in wet conditions. Ensure all seals and connectors are intact and properly tightened. If the display does get wet, immediately power off the e-bike and allow it to dry completely before attempting to use it again. Regularly inspect for any signs of water ingress and address them promptly to prevent further damage and maintain optimal functionality.
Secure Cable Connections
Loose wiring and connector issues are frequent causes of display malfunctions. Regularly inspect all cables connecting the display to the controller and battery, ensuring they are firmly seated and free from damage. Gently wiggle the connectors to check for intermittent connections. Avoid pulling or straining the cables during maintenance or adjustments. Use dielectric grease on connectors to prevent corrosion and improve conductivity. Secure cables with zip ties or cable sleeves to prevent them from becoming loose during rides, safeguarding against unexpected display failures.
Advanced Troubleshooting
Controller and throttle testing are crucial if basic steps fail. A malfunctioning controller or throttle can prevent display functionality, requiring professional diagnosis.
Checking the Controller
The controller is the brain of your e-bike, and a failure here can manifest as a non-responsive display.
Visually inspect the controller for any signs of physical damage, such as burnt components or loose connections.
If possible, use a multimeter to check the voltage output from the controller to the display connector, ensuring it matches the specified voltage.
Carefully examine all wiring connected to the controller, looking for corrosion or breaks.
A faulty controller often requires professional repair or replacement, as internal components are complex.
Remember to disconnect the battery before performing any controller inspection to avoid electrical shock.
Testing the Throttle
A malfunctioning throttle can prevent the display from receiving signals, appearing as if it’s not working.
Disconnect the throttle from the controller and use a multimeter to check its resistance as you twist the grip.
You should observe a smooth change in resistance, indicating the throttle is functioning correctly.
If the resistance is erratic or nonexistent, the throttle likely needs replacement.
Ensure the throttle connector is clean and securely fastened to the controller.
A faulty throttle can also sometimes cause error codes to appear on the display, if it briefly powers on.
Resources for Further Help
Online forums, like r/ebike on Reddit, offer community support and troubleshooting advice.
Manufacturer support provides specific guidance for your e-bike model and display.
Online Forums (r/ebike)
Reddit’s r/ebike forum is a vibrant community where enthusiasts share experiences and solutions. Users frequently discuss display issues, offering practical advice for troubleshooting non-responsive screens or interpreting fault codes;
Recent posts highlight common problems like displays failing despite working batteries and connections, or issues with battery voltage readings.
The forum provides a platform to ask questions, search for similar cases, and benefit from collective knowledge. It’s an invaluable resource for DIY repairs and understanding your e-bike’s system.
Manufacturer Support
Directly contacting your e-bike manufacturer is often the most reliable path to resolving display issues. They possess specific knowledge of your model’s components and software.
Manufacturer support can provide detailed manuals, troubleshooting guides, and even replacement display options. Don’t hesitate to utilize warranty services if your display is still covered. They can diagnose complex problems beyond basic troubleshooting steps, offering expert assistance and ensuring compatibility with your e-bike’s system.