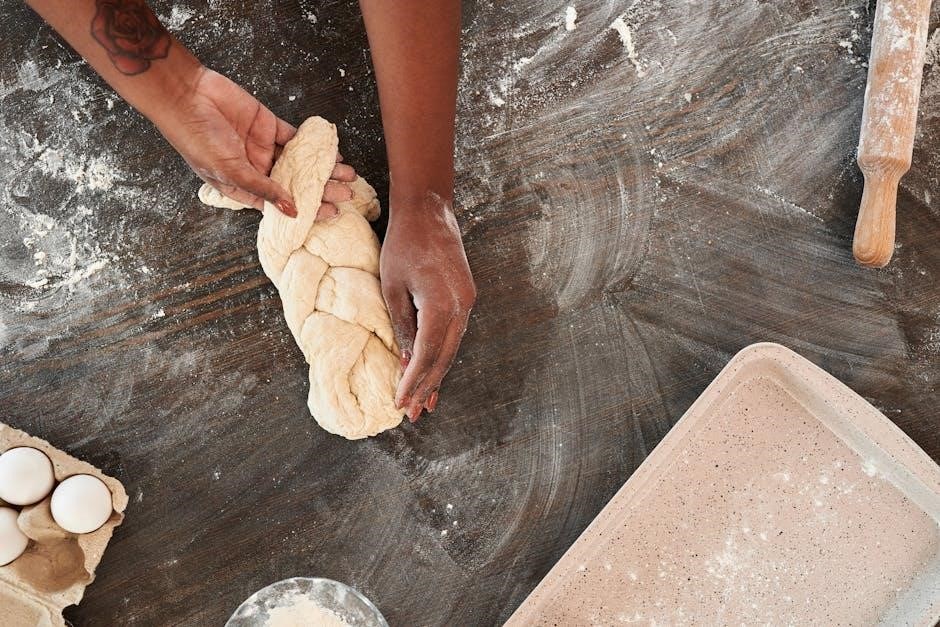
Bread machines offer convenience, automating the baking process for fresh loaves at home․ This guide helps troubleshoot common issues, ensuring baking success with your new appliance․
Many enjoy the simplicity of bread machines, especially after pandemic-era baking booms, seeking perfect loaves with minimal effort and maximum flavor․
What is a Bread Machine?
A bread machine, also known as an automatic bread baker, is a countertop appliance designed to automate the bread-making process․ Unlike traditional baking, which requires manual kneading and proofing, a bread machine handles everything from mixing ingredients to baking the final loaf – all within a single, self-contained unit․
These machines typically feature a non-stick baking pan, a kneading paddle, and a heating element․ Users simply add ingredients into the pan, select a pre-programmed cycle, and the machine takes care of the rest․ This makes bread machines incredibly convenient for those seeking freshly baked bread without the time commitment of traditional methods, especially appealing to those inspired by baking shows or pandemic-era baking trends․
Benefits of Using a Bread Machine
Using a bread machine offers numerous advantages, primarily convenience and control over ingredients․ Enjoy freshly baked bread without the labor of kneading and proofing, perfect for busy lifestyles or those new to baking․ You can customize recipes, avoiding unwanted additives and preservatives found in store-bought bread․
Bread machines also provide consistent results, thanks to pre-programmed cycles․ This is especially helpful for achieving perfect loaves, even for beginners․ Many bakers rediscovered the joy of bread making during recent times, finding bread machines a reliable and rewarding way to create delicious, homemade bread․

Understanding Your Bread Machine (Zojirushi BBCC-X20 Specifics)
The Zojirushi BBCC-X20 boasts advanced features for consistent baking; Familiarizing yourself with its components and cycles unlocks its full potential for delicious results․
Key Components of the BBCC-X20
The Zojirushi BBCC-X20 features several crucial components working in harmony․ The baking pan, non-stick coated, holds ingredients during mixing and baking․ A kneading paddle, also non-stick, efficiently mixes and develops gluten․ The heating element, located within the machine, provides consistent and even heat distribution for optimal baking․
A clear viewing window allows monitoring progress without interrupting the cycle․ The lid securely seals the machine, maintaining temperature and humidity․ Finally, the control panel, detailed elsewhere, manages all settings and cycles․ Understanding each part ensures proper operation and longevity of your bread machine․
Control Panel Overview
The BBCC-X20’s control panel offers intuitive operation․ Cycle selection buttons allow choosing from pre-programmed settings like White Bread, Whole Wheat, and French Bread․ Crust color control adjusts the final crust’s darkness – light, medium, or dark․ A timer function enables delayed starts, perfect for fresh bread in the morning․
Start/Stop buttons initiate or halt the baking process․ Menu and adjustment buttons navigate settings and customize recipes․ A clear LCD display shows cycle time remaining and selected options․ Familiarizing yourself with these controls unlocks the machine’s full potential․
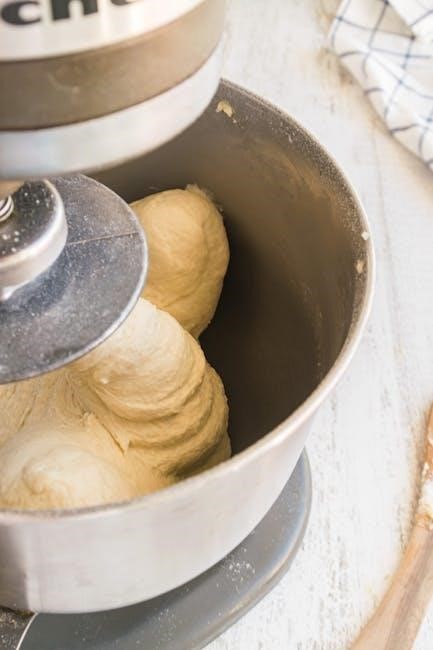
Basic Operation: The White Bread Cycle
To begin with the White Bread cycle, ensure the kneading paddle is securely in the pan․ Add ingredients in the order recommended – liquids first, then dry, with yeast last, avoiding direct contact with liquids․ Select the “White Bread” cycle and your desired crust color․ Press “Start․”
The machine will automatically knead, rise, and bake․ Avoid opening the lid during operation unless absolutely necessary, as this can affect rising․ Once complete, carefully remove the hot pan using oven mitts․ Let cool before slicing and enjoying your freshly baked bread!
Ingredients and Measurements
Precise measurements are crucial for bread machine success; inaccurate amounts impact texture and rise․ Flour type and yeast activation significantly influence the final product․
Importance of Accurate Measurements
Achieving consistent results with your bread machine hinges on precise ingredient measurements․ Unlike traditional baking, bread machines operate within a tightly controlled environment, making them less forgiving of variations․ Even slight discrepancies can dramatically affect the dough’s consistency, rise, and the final loaf’s texture․
Too much flour, for instance, leads to a dense, crumbly bread, while insufficient flour results in a sticky, misshapen loaf․ Similarly, incorrect yeast amounts can hinder proper rising․ Always use measuring cups and spoons specifically designed for baking, leveling off dry ingredients for accuracy․ Liquid measurements should be taken in liquid measuring cups at eye level․
Types of Flour for Bread Machines
Selecting the right flour is crucial for bread machine success․ Bread flour, with its higher protein content, develops more gluten, resulting in a chewier, more structured loaf – ideal for many cycles․ All-purpose flour works, but may yield a slightly softer texture․ Whole wheat flour adds a nutty flavor and increased nutritional value, but requires more liquid and often a longer rise time․
Experimenting with different flours is encouraged! Rye flour, for example, imparts a distinctive flavor, while bread machine recipes often specify flour blends for optimal results․ Always refer to your recipe for the recommended flour type․
Yeast: Types and Activation
Yeast is the engine of your bread machine loaf! Active dry yeast and instant yeast are the most common types․ Instant yeast can be added directly to the dry ingredients, simplifying the process; Active dry yeast typically requires proofing – dissolving in warm water (105-115°F) with a pinch of sugar – to ensure viability․
Expired yeast is a frequent cause of bread machine failures․ Always check the expiration date! Proper activation is vital; water that’s too hot will kill the yeast, while water that’s too cold won’t activate it․ A foamy texture indicates successful activation․
Common Bread Machine Problems & Troubleshooting
Encountering issues? This section diagnoses frequent bread machine problems – crumbly tops, rising failures, and uneven baking – offering quick fixes for perfect loaves․
Crumbly Bread Top & Misshapen Loaves
A common frustration is a crumbly top or oddly shaped loaf․ Several factors contribute to this issue, often stemming from ingredient imbalances․ Too much flour is a primary culprit, creating a dry, unstable structure that easily crumbles during baking․ Conversely, incorrect yeast amounts or yeast not properly activated can hinder proper rise and loaf formation․
Ensure precise measurements, especially flour, and verify your yeast’s freshness and activation process․ A weak rise leads to a misshapen loaf, while excessive dryness results in a crumbly texture․ Experimenting with slight adjustments to flour quantity can often resolve this issue, alongside confirming optimal yeast performance․
Too Much Flour
Excess flour is a frequent cause of crumbly bread tops and dense, poorly risen loaves․ It disrupts the delicate balance of hydration needed for gluten development, resulting in a dry, brittle structure․ This lack of elasticity prevents the loaf from expanding properly during baking, leading to cracking and crumbling․
Carefully measure flour using the spoon-and-level method, avoiding packing․ Consider humidity; flour absorbs moisture, so slightly reduce the amount on humid days․ A crumbly top often signals insufficient moisture, directly linked to excessive flour․ Accurate measurement is paramount for successful bread machine baking․
Incorrect Yeast Amount/Activation
Insufficient or improperly activated yeast severely hinders dough rising, leading to dense, misshapen loaves and a crumbly texture․ Yeast is the engine of bread making, producing the gases that create air pockets and a light, airy crumb․ Using expired yeast, or failing to activate it correctly in warm liquid with a touch of sugar, renders it ineffective․
Always check the yeast’s expiration date․ Ensure the water temperature is within the recommended range (typically 105-115°F) for optimal activation․ A lack of yeast activity results in a flat, dense loaf, often with a crumbly top․
Dough Not Rising
A failure of the dough to rise is a common bread machine frustration, resulting in a dense, brick-like loaf․ Several factors contribute to this issue, primarily relating to the yeast․ Expired yeast is a frequent culprit, losing its potency over time and failing to produce the necessary gases for leavening․
Additionally, temperature issues play a critical role; if the kitchen is too cold, the yeast may not activate properly․ Ensuring a warm environment and correctly measuring ingredients are vital for successful dough rising and a light, airy bread texture․
Expired Yeast
Expired yeast is a primary reason for dough failing to rise in your bread machine․ Yeast is a living organism, and its viability diminishes over time․ Even if within the “best by” date, improper storage – exposure to air, moisture, or heat – can accelerate its decline․
To test yeast activity, dissolve a teaspoon in warm water with a pinch of sugar; if it doesn’t foam within 10 minutes, it’s likely expired and should be replaced․ Using fresh yeast ensures proper leavening and a successful, fluffy loaf every time․
Temperature Issues
Temperature plays a crucial role in yeast activation and dough rising․ If your kitchen is too cold, the yeast may struggle to become active, resulting in a dough that doesn’t rise adequately․ Conversely, excessively warm temperatures can kill the yeast, leading to the same outcome․
Ensure the bread machine is placed in a draft-free location, away from cold windows or direct sunlight․ Some machines have a warming function; utilize it if your kitchen is cool․ Consistent, moderate temperatures are key for optimal dough development․
Uneven Baking
Achieving a uniformly baked loaf requires careful attention to ingredient distribution and machine placement․ Uneven baking often stems from ingredients not being thoroughly combined, leaving pockets of dry flour or concentrated yeast․ Ensure all ingredients are measured accurately and added in the order specified by your recipe, allowing for proper mixing․
Proper ventilation around the bread machine is also vital․ Avoid placing it in enclosed spaces, as heat buildup can cause uneven cooking․ A stable, level surface prevents tilting and promotes consistent heat distribution throughout the baking process․
Uneven Ingredient Distribution
A primary cause of uneven baking is inconsistent ingredient mixing within the bread machine․ Dry ingredients, particularly flour, can clump in corners, preventing full hydration and leading to dense or underbaked spots․ To mitigate this, ensure ingredients are added in the correct order – liquids first, then dry, with yeast last, avoiding direct contact with liquids․
Gentle shaking of the machine mid-cycle can help redistribute ingredients․ Always double-check that the paddle is securely attached and functioning correctly to thoroughly incorporate everything for a uniform texture․
Machine Placement & Ventilation
Proper placement is crucial for optimal bread machine performance․ Avoid positioning the machine near drafts or direct sunlight, as temperature fluctuations can affect rising and baking․ Ensure adequate ventilation around the machine; heat buildup can lead to uneven cooking and potentially damage the appliance․
Allow several inches of space on all sides for airflow․ Do not enclose the machine in a cabinet during operation․ A well-ventilated area promotes consistent temperatures, resulting in evenly baked, perfectly textured loaves every time․
Advanced Bread Machine Techniques
Explore beyond basic loaves! Adjust recipes for altitude, experiment with rye and chocolate variations, and enhance flavors with nuts, seeds, and delicious fruits․
Using Different Recipes (Rye, Chocolate)
Venturing beyond white bread unlocks a world of flavor! Rye and chocolate breads, while tempting, often present challenges for novice bread machine users․ Initial attempts may yield crumbly tops and misshapen loaves – common pitfalls easily addressed with understanding․
These recipes frequently require adjustments to liquid ratios or proofing times․ Rye flour, for instance, absorbs more water than wheat flour․ Chocolate recipes may need reduced sugar to prevent stickiness․ Don’t be discouraged by initial failures; troubleshooting is key to mastering these delightful variations!
Experimentation and careful observation are vital for success․
Adjusting Recipes for Altitude
High altitude baking demands recipe adjustments due to lower air pressure․ This affects yeast activity and liquid evaporation, potentially leading to risen, then collapsed loaves or overly dry bread․ Generally, at higher elevations, reduce yeast by ¼ to ½ teaspoon and increase liquid by 1 to 2 tablespoons per cup․
Decreasing sugar by a similar proportion can also help control excessive rising․ These adjustments compensate for the faster evaporation and increased yeast activity․ Start with small changes and carefully observe the dough’s consistency and final product․
Altitude impacts baking significantly; experimentation is crucial․
Adding Mix-Ins (Nuts, Seeds, Fruits)
Enhance your bread with delightful mix-ins like nuts, seeds, or dried fruits! Add these ingredients during the second knead cycle, signaled by the bread machine’s beep․ This ensures even distribution without hindering initial dough development․ Typically, 1/2 to 1 cup of mix-ins is sufficient for a standard loaf․
For larger or delicate additions, consider a slight reduction in liquid to maintain dough consistency․ Chopped nuts and smaller fruits integrate best․ Experiment with flavors – cranberries and walnuts, sunflower seeds, or chocolate chips!
Enjoy personalized, flavorful loaves․
Bread Machine Maintenance
Regular cleaning extends your bread machine’s life․ Proper pan and paddle care prevents sticking, ensuring consistent results and preserving your investment for years to come․
Cleaning Your Bread Machine
Thorough cleaning after each use is crucial for optimal performance and longevity․ Always unplug the machine and allow all components to cool completely before beginning․ Remove the baking pan and kneading paddle; these are typically non-stick coated and should be hand-washed with warm, soapy water․ Avoid abrasive cleaners, as they can damage the coating․
The machine’s housing can be wiped down with a damp cloth․ Ensure no water enters the electrical components․ For stubborn residue, a mild detergent solution can be used, followed by a clean, damp wipe․ Regularly inspect the heating element for crumbs and gently remove them․ Proper cleaning prevents buildup and ensures consistently delicious bread!
Pan and Paddle Care
Proper care of your bread machine’s pan and paddle is essential for consistent baking results․ The non-stick coating on both requires gentle handling; avoid using metal utensils that can scratch the surface․ After each use, wash them thoroughly with warm, soapy water and a soft sponge․
Ensure all dough residue is removed․ While dishwasher safe in some models, handwashing extends their lifespan․ Inspect the paddle for any signs of wear or damage․ A damaged paddle can affect kneading and loaf shape․ Regularly seasoning the pan with a light coating of oil can help maintain its non-stick properties․
Long-Term Storage
When storing your bread machine for extended periods, thorough cleaning is paramount․ Ensure the pan and paddle are spotless and completely dry to prevent mold growth․ Wipe down the exterior with a damp cloth․ Remove any detachable parts and store them separately in a safe place․
Cover the machine with its original packaging or a dust cover to protect it from dust and scratches․ Store it in a cool, dry location, away from direct sunlight and extreme temperatures․ Periodically check the machine during storage to ensure no issues arise․
Understanding Bread Machine Cycles
Bread machines feature diverse cycles – basic, French, and whole wheat – each optimized for specific doughs and baking profiles, ensuring perfect results every time․
Basic Cycle
The Basic cycle is your bread machine’s workhorse, ideal for standard white bread recipes and a great starting point for beginners․ This cycle typically includes kneading, rising, and baking phases, all automated within a timeframe of around three to four hours․ It’s designed for simplicity, handling most standard loaf sizes and ingredient combinations effectively․
When first using your machine, or experimenting with new recipes, the Basic cycle provides a reliable foundation․ It allows you to understand how your bread machine interacts with different ingredients before venturing into more specialized cycles․ Mastering this cycle is key to unlocking the full potential of your appliance and consistently producing delicious, homemade bread․
French Bread Cycle
The French Bread cycle is specifically engineered to create loaves with a crispier crust and a more open, airy crumb, characteristics of traditional French bread․ This cycle often utilizes a higher baking temperature and may include a pre-heat phase to achieve that desirable crust․ It typically has a longer rise time, allowing for greater gluten development and a lighter texture․
Recipes for this cycle often call for higher protein flour and may benefit from a slightly drier dough consistency․ Experimenting with hydration levels is key to achieving the perfect French loaf in your bread machine․ This cycle is a fantastic way to elevate your bread-making game!
Whole Wheat Cycle
The Whole Wheat cycle is designed for baking with whole wheat flour, which requires adjustments to kneading and rising times due to its bran content․ Bran interferes with gluten development, so this cycle typically features a longer kneading period and often includes extra rising time to compensate․ It’s crucial to use bread machine yeast specifically formulated for whole wheat recipes․
Recipes for this cycle often include vital wheat gluten to improve the loaf’s structure and rise․ Expect a denser loaf compared to white bread, but still wonderfully flavorful and nutritious․ Experiment with different percentages of whole wheat flour!

The “Heel” of the Bread
Bread heels, the first and last slices, are often discarded, yet hold cultural significance and a perfect pairing with a stick of butter!
Identifying the First and Last Slices
Determining the heel of a bread machine loaf is surprisingly straightforward․ The “first” slice is the one released from the machine initially, often slightly rounded due to the loaf pan’s shape․ Conversely, the “last” slice emerges at the very end of the baking cycle, mirroring the first in its form․
Some refer to both end pieces simply as “end pieces,” but the term “heel” is widely recognized․ Recognizing these slices isn’t just about identifying what to potentially discard; it’s acknowledging a small, often overlooked, part of the baking tradition․ These slices are often denser and slightly different in texture․
Cultural Significance of Bread Heels
Bread heels, often the first and last slices, hold a surprising place in culinary tradition․ Historically, they weren’t discarded but appreciated – a testament to resourcefulness and minimizing waste․ A loaf of bread paired with a stick of butter represents a timeless, comforting combination, and the heel is part of that experience․
While some may avoid them, others cherish the heel’s denser texture, perfect for toast or bread pudding․ This preference varies culturally, reflecting different attitudes towards food and frugality․ The heel symbolizes simplicity and a connection to baking’s roots․