
Zoom F6 Manual: A Comprehensive Guide
This comprehensive guide details the Zoom F6 MultiTrack Field Recorder’s operation, covering setup, recording, mixing, and computer connectivity.
Explore features via included software and user manuals, ensuring optimal performance.
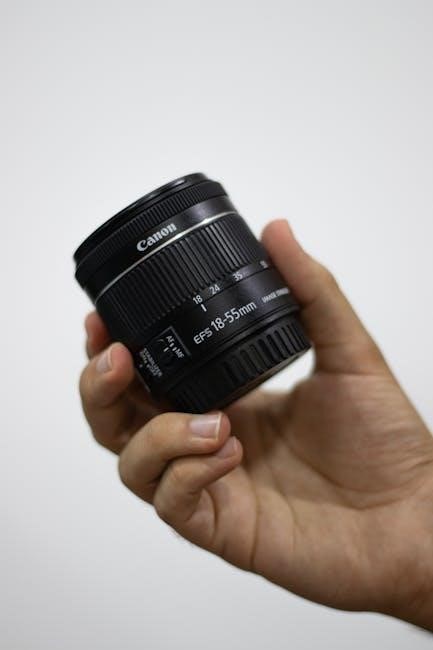
The Zoom F6 is a professional, multi-track field recorder and mixer designed for demanding audio applications. It’s a versatile tool suited for filmmakers, sound designers, musicians, and anyone requiring high-quality audio capture in portable environments. Unlike simpler recorders, the F6 offers a robust feature set, including six discrete inputs, phantom power for condenser microphones, and the groundbreaking 32-bit float recording capability.
This recorder distinguishes itself with its ability to capture an incredibly wide dynamic range, minimizing the need for precise gain staging. Even if audio levels are initially set incorrectly, the 32-bit float format preserves detail, preventing clipping and allowing for significant post-production adjustments. The F6 isn’t just a recorder; it functions as a fully capable mixer, offering comprehensive control over input levels, panning, and monitoring.
Included accessories, such as the camera adapter, enhance its usability in filmmaking workflows. Software downloads like Cubase LE and WaveLab LE provide a complete digital audio workstation (DAW) solution for editing and mastering your recordings. This manual will guide you through every aspect of the F6, from initial setup to advanced techniques, unlocking its full potential for your audio projects.
Unboxing and Included Accessories
Upon opening your Zoom F6 package, you’ll find several components designed to get you recording quickly and efficiently. The core of the package is, of course, the Zoom F6 MultiTrack Field Recorder itself, a robust and portable device built for field work. Included is a dedicated adapter specifically designed for mounting the F6 directly onto your camera, facilitating seamless synchronization of audio and video during filmmaking.

To power your recording sessions, the package contains four AA batteries, providing immediate usability without the need for separate purchases. Beyond the hardware, Zoom provides valuable software to enhance your workflow. You’ll receive codes for downloading Cubase LE and WaveLab LE, entry-level versions of professional Digital Audio Workstations (DAWs) for editing and mastering your audio.
Finally, a comprehensive user manual is included, offering detailed instructions on all aspects of the F6’s operation. While the device is intuitive, the manual serves as an invaluable resource for unlocking its full potential and mastering its advanced features. Ensure all listed items are present and in good condition before proceeding.
Physical Overview: Inputs and Outputs
The Zoom F6 boasts a comprehensive array of inputs and outputs, designed for versatility in various recording scenarios. On the front panel, you’ll find four XLR/TRS combo inputs, accommodating both microphone and line-level signals. Each input features a dedicated gain control for precise level adjustment. A dedicated 3.5mm stereo mini-jack input is also present, useful for connecting consumer-grade audio sources.

Moving to the rear panel, the F6 offers a range of output options. Two XLR outputs provide balanced line-level signals, ideal for connecting to external mixers or recording devices. A 3.5mm stereo mini-jack output is also available for headphone monitoring or direct connection to cameras. Crucially, a USB-C port facilitates both power and audio interface functionality when connected to a computer.
Additional connectivity includes dedicated inputs and outputs for timecode, enhancing synchronization capabilities in professional workflows. The robust build quality and clearly labeled ports ensure reliable operation in demanding field conditions. Understanding the placement and function of each input and output is key to maximizing the F6’s potential.
Powering the Zoom F6
The Zoom F6 offers flexible power options to suit diverse recording environments. It can be powered via four AA batteries, providing portability for remote locations. Battery life varies depending on usage, with longer durations achievable using efficient recording settings and minimizing phantom power draw.
Alternatively, the F6 can be powered via a USB-C connection. Connecting to a computer or a compatible USB power adapter provides continuous power, eliminating concerns about battery depletion during extended recording sessions; A DC adapter (sold separately) offers another reliable power source, particularly useful for stationary setups.
The device displays a battery level indicator on the screen, allowing you to monitor remaining power. It’s recommended to use rechargeable AA batteries for cost-effectiveness and environmental responsibility. When using external power, the F6 automatically switches to that source, ensuring uninterrupted operation. Proper power management is crucial for reliable field recording.
Understanding the Zoom F6 Display
The Zoom F6 features a clear and informative LCD display, crucial for monitoring recording parameters and navigating the device’s functions. The screen presents vital information, including input levels, recording time, battery status, and selected recording format (WAV or MP3). Visual level meters provide real-time feedback on audio signal strength for each channel.
The display also showcases menu options, allowing you to adjust settings like gain, phantom power, low-cut filters, and timecode settings. Dedicated icons indicate active features, such as limiter engagement or auto-level control. Brightness adjustment is available to optimize visibility in varying lighting conditions.
Understanding the display’s layout is key to efficient operation. Familiarize yourself with the location of key indicators and controls. The screen’s responsiveness ensures smooth navigation through menus and settings. Regularly checking the display during recording helps maintain optimal audio quality and prevent unexpected issues.
Navigating the Menu System
The Zoom F6’s menu system is accessed via dedicated buttons on the front panel, offering comprehensive control over the recorder’s functions. The menu is logically organized into several sections: Recording, Input, Mixer, System, and Utilities. Use the jog wheel to scroll through menu options and select desired settings.
Within each section, submenus provide access to specific parameters. For example, the Recording menu allows adjustment of file format, bit depth, and sample rate. The Input menu controls gain, phantom power, and low-cut filters for each channel. The System menu manages device settings like display brightness and USB audio interface configuration.
Mastering the menu navigation is essential for customizing the Zoom F6 to your specific needs. The display clearly indicates the currently selected option. Pressing the ‘Enter’ button confirms selections. Remember to save any changes made to ensure they are retained. A quick reference guide to the menu structure can significantly speed up workflow.
Setting Up Basic Recording Parameters
Before recording with your Zoom F6, configuring basic parameters is crucial for optimal audio quality. Begin by selecting your desired recording format – WAV or MP3 – within the Recording menu. WAV offers superior fidelity, while MP3 provides smaller file sizes. Next, choose the appropriate bit depth and sample rate. For professional results, 24-bit/48kHz is a standard choice.
Consider enabling or disabling phantom power (+48V) for condenser microphones connected to the inputs. Adjust input levels carefully to avoid clipping or excessive noise. Utilize the auto-level function as a starting point, then fine-tune manually for best results. Ensure correct input assignment for each channel.
Setting a proper recording name and folder structure helps with organization. The Zoom F6 allows for custom naming conventions. Finally, verify the media card is properly inserted and has sufficient free space. These initial settings lay the foundation for successful recordings.
Using the Zoom F6 as a Mixer
The Zoom F6 functions effectively as a standalone mixer, offering comprehensive control over your audio sources. Each of the six input channels features a dedicated gain knob, allowing precise level adjustment. Utilize the low-cut filter to reduce unwanted rumble and noise from lower frequencies. The built-in compressor can help manage dynamic range, ensuring a consistent signal.
Pan each channel left or right to create a stereo image. The F6 provides access to EQ settings, enabling tonal shaping of individual inputs. Monitor your mix through the headphone output, adjusting levels to achieve a balanced sound. Assign inputs to specific outputs for flexible routing options.
The mixer functionality is invaluable for live sound reinforcement or creating pre-mixed tracks for post-production. Remember to save mixer scenes for quick recall of preferred settings. Experiment with the various controls to tailor the sound to your specific needs.
Input Gain Staging and Levels
Proper input gain staging is crucial for optimal recording quality with the Zoom F6. Begin by setting the gain knobs on each channel to a moderate level. Speak or play into the microphone at the loudest expected volume, then adjust the gain so the signal peaks around -12dBFS on the display. This provides sufficient headroom to prevent clipping.
Avoid setting the gain too low, as this can result in a noisy recording. Conversely, excessive gain will cause distortion. Utilize the F6’s visual meters to monitor input levels closely. Pay attention to the peak hold indicator, which shows the highest level reached.
For instruments with a wide dynamic range, use the compressor to control peaks and maintain a consistent level. Remember that gain staging affects the overall signal-to-noise ratio. Careful adjustment ensures a clean, professional-sounding recording. Regularly check levels throughout the recording process.
Recording Formats: WAV and MP3
The Zoom F6 supports two primary recording formats: WAV and MP3. WAV files offer uncompressed, high-fidelity audio, ideal for professional applications like post-production and mixing. Within WAV, you can choose various bit depths and sample rates, including the advanced 32-bit float option for exceptional dynamic range.

MP3, on the other hand, utilizes compression to reduce file size, making it suitable for situations where storage space or bandwidth is limited. However, this compression comes at the cost of some audio quality; The F6 allows you to select different MP3 bitrates to balance file size and fidelity.
For critical recordings, WAV is strongly recommended. When using WAV, consider the benefits of 32-bit float recording, which minimizes the risk of clipping and provides greater flexibility in post-processing. MP3 is a viable option for drafts or less demanding applications.
32-bit Float Recording Explained
The Zoom F6’s standout feature is its 32-bit float recording capability. Unlike traditional recording methods, 32-bit float captures an incredibly wide dynamic range, essentially eliminating the worry of setting incorrect gain levels. This means you can record without clipping, even with unpredictable sound sources.
Traditional recording uses integer-based systems where exceeding the maximum level results in distortion. 32-bit float, however, uses a floating-point system, allowing it to capture signals far beyond the typical range without clipping. Lower-level signals are also recorded with exceptional clarity, minimizing noise floor issues.
In post-production, you have significant latitude to adjust levels without introducing unwanted artifacts. This is a game-changer for location sound recordists facing unpredictable environments. While files are larger, the security and flexibility of 32-bit float recording are invaluable for professional audio work.
Using Timecode with the Zoom F6
The Zoom F6 supports timecode, crucial for synchronizing audio with video in post-production workflows. It can operate as a master timecode source or be synced to an external timecode generator via various connection options. Accurate timecode ensures seamless alignment during editing.
The F6 offers several timecode settings, including drop frame and non-drop frame, catering to different video standards. You can also manually set the timecode or use the ‘auto’ function, which increments the timecode continuously. Proper timecode setup is vital for professional film and video projects.
When using multiple recorders, ensure they are all synced to the same timecode source to avoid synchronization issues. The F6’s timecode features streamline the post-production process, saving valuable time and effort. Regularly check timecode accuracy during recording to maintain project integrity.
Connecting to a Computer: USB Audio Interface
The Zoom F6 functions as a multi-channel USB audio interface when connected to a computer, enabling direct recording into your Digital Audio Workstation (DAW). This eliminates the need for separate audio interfaces for recording and playback. Simply connect the F6 to your computer using a USB cable.
Upon connection, the F6 will be recognized by your operating system as an audio device; You can then select it as the input and output device within your DAW’s audio settings. The F6 supports various sample rates and bit depths, ensuring compatibility with most DAWs.
Using the F6 as an audio interface allows for high-quality audio capture directly into your computer. It’s ideal for podcasting, music production, and voice-over work. Ensure you have the latest drivers installed for optimal performance and stability. The USB connection also facilitates firmware updates.
Firmware Updates and Software Downloads
Keeping your Zoom F6 firmware up-to-date is crucial for optimal performance, bug fixes, and access to new features; Zoom regularly releases firmware updates available for download on their official support website. These updates enhance stability and compatibility.
To update the firmware, download the latest version from the Zoom website and follow the provided instructions. Typically, this involves transferring the firmware file to an SD card, inserting the card into the F6, and initiating the update process through the device’s menu system.
Alongside firmware, Zoom provides downloadable software, including Cubase LE and WaveLab LE, bundled with the F6. These software packages offer powerful tools for audio editing and production. Access these downloads through the codes included with your F6 purchase. Regularly check the Zoom website for additional software and utility updates to maximize your F6 experience.
Troubleshooting Common Issues
Encountering issues with your Zoom F6? Several common problems have straightforward solutions. If the device fails to power on, ensure batteries are correctly installed or the external power supply is functioning. For recording errors, verify sufficient SD card space and compatibility – Zoom recommends specific card types for optimal performance.
Audio distortion can often be resolved by adjusting input gain staging. Ensure levels aren’t peaking and are appropriately set for each source. If USB connectivity is problematic, try a different cable or USB port, and confirm the latest drivers are installed on your computer.
Should the display freeze, attempt a soft reset by holding the power button. If issues persist, consult the comprehensive Zoom support resources online, including FAQs and troubleshooting guides. Remember to check the official Zoom website for known issues and solutions specific to the F6 model.
Zoom F6 Specifications

The Zoom F6 is a professional-grade, multi-track field recorder and mixer. It boasts six discrete inputs, including four XLR/TRS combo jacks and two dedicated XLR inputs with phantom power (48V). Recording formats include WAV and MP3, with the groundbreaking 32-bit float recording capability offering exceptional dynamic range.
It features a high-resolution LCD screen for intuitive operation and menu navigation. The F6 operates on four AA batteries or via USB power, providing flexibility in the field. Its integrated USB audio interface allows for seamless connectivity to computers for recording and playback.
Key specifications include a frequency response of 20Hz-20kHz, a maximum input level of +24dBu, and an output impedance of 50 ohms. The device supports SD card capacities up to 512GB. Dimensions are 168.5mm (W) x 67.8mm (H) x 130.7mm (D), and it weighs approximately 752g (without batteries).
Resources and Further Support
For comprehensive assistance with your Zoom F6, several resources are readily available. The official Zoom website (https://www.zoomcorp.com/) provides access to the complete Zoom F6 manual in PDF format, offering detailed explanations of all features and functions.
Zoom’s support section also hosts frequently asked questions (FAQs), troubleshooting guides, and firmware updates to ensure your device operates optimally. Downloadable software, including Cubase LE and WaveLab LE (included with some purchases), enhances your recording and editing workflow.
Furthermore, the Zoom community forum is a valuable platform to connect with other users, share experiences, and seek advice. Zoom’s support team can be contacted directly through their website for personalized assistance; Single-page quick start guides and more extensive six-page manuals are also available for rapid onboarding and deeper understanding.