
Honeywell Humidifier Manual: A Comprehensive Guide
Honeywell offers diverse humidifier models; this guide analyzes over 50, focusing on performance, capacity, and user feedback for optimal home comfort solutions.
Understanding Honeywell Humidifier Models
Honeywell presents a wide array of humidifier models, each designed with specific features to cater to varying needs and home sizes. From compact cool mist options ideal for individual rooms to robust whole-house systems integrated with your furnace, understanding these distinctions is crucial.
The selection process involves considering factors like tank capacity – ranging from under a gallon to substantial 17-gallon units – and mist type, encompassing both cool mist and ultrasonic technologies. Evaluating noise levels and the inclusion of smart humidistat controls further refines the choice.
Honeywell’s catalog includes filter-free operation models, simplifying maintenance, alongside those requiring periodic filter replacements. Identifying your specific model number is key to accessing relevant replacement parts and ensuring optimal performance.
Popular Honeywell Humidifier Series
Honeywell’s humidifier lineup features several popular series, each targeting distinct user preferences. The Designer Series, for example, prioritizes aesthetics alongside functionality, offering cool mist humidification with a stylish design. For larger homes, the Whole House Humidifier series, often paired with a humidistat (like the HE280D), provides comprehensive moisture distribution.

The cool mist and ultrasonic humidifier ranges offer versatile options for smaller spaces. Ultrasonic models, known for their quiet operation, are particularly favored for bedrooms.
Identifying the specific series – such as the HWM845B – helps pinpoint compatible replacement filters and accessories. Honeywell continually updates its offerings, so exploring the current catalog is recommended to discover the latest innovations in home humidity control.
Honeywell Cool Mist Humidifiers
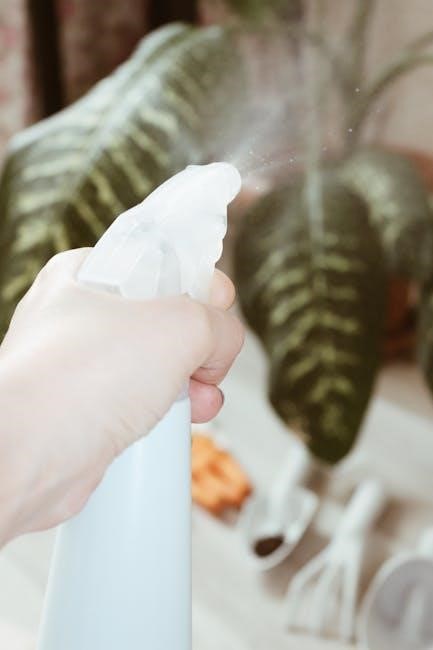
Honeywell cool mist humidifiers utilize evaporation to release moisture, offering a drug-free way to alleviate congestion and soothe dry skin. These models, like the Designer Series, are generally considered safe for children and pets as they don’t produce hot steam. They operate by blowing air through a saturated wick or filter, creating a visible, cool mist.
Regular cleaning is crucial for cool mist humidifiers to prevent mold and bacteria growth within the water tank and wick. Filter replacement, if applicable to the specific model, is also essential for maintaining optimal performance and air quality.
These humidifiers are ideal for individual rooms and offer adjustable humidity settings via a humidistat for personalized comfort.
Honeywell Ultrasonic Humidifiers
Honeywell ultrasonic humidifiers employ high-frequency vibrations to create a fine, cool mist without a fan or wick. This technology results in exceptionally quiet operation, making them suitable for bedrooms and nurseries; They are energy-efficient and often feature adjustable mist output levels controlled by an integrated humidistat.
While generally safe, ultrasonic humidifiers can potentially release mineral dust into the air if tap water is used. Therefore, distilled water is highly recommended to prevent white dust buildup on surfaces and ensure cleaner air.
Regular cleaning of the transducer (the vibrating component) is vital to maintain performance and prevent scaling.
Honeywell Whole House Humidifiers
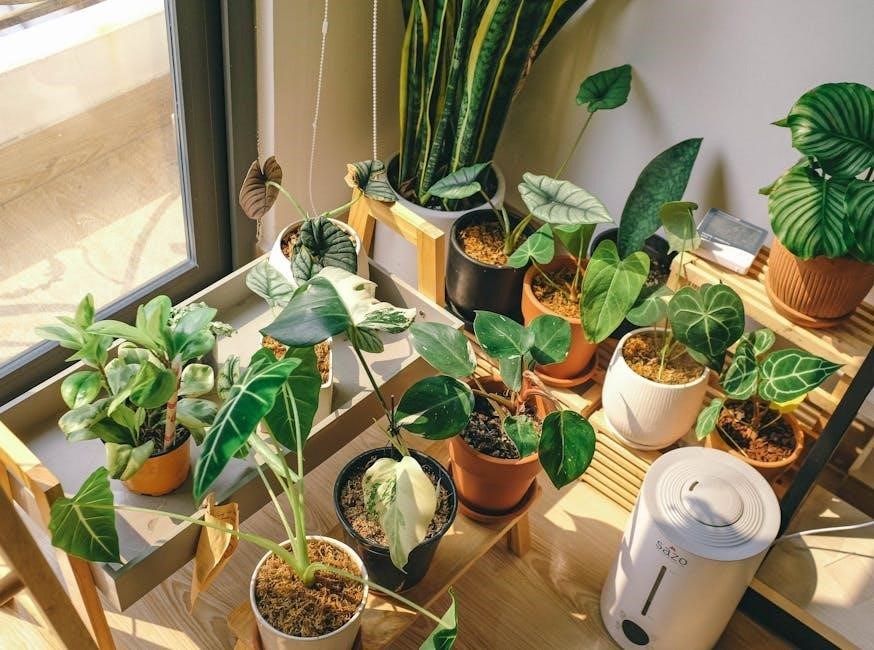
Honeywell whole house humidifiers integrate directly with your home’s HVAC system, providing consistent humidity throughout the entire living space. Designed for homes ranging from 2,000 to 4,000 square feet, these systems utilize the furnace to distribute moisture, effectively combating dry air during winter months.
These humidifiers help preserve wood floors and furniture, reduce static electricity, and alleviate dry skin and respiratory discomfort. Installation typically requires professional assistance to ensure proper connection to the furnace and water supply.
Regular maintenance, including pad replacement and cleaning, is crucial for optimal performance and water quality.
Setting Up Your Honeywell Humidifier
Proper setup ensures efficient and safe operation of your Honeywell humidifier. Begin by selecting a level surface away from furniture and electronics to prevent water damage. Carefully unpack all components and verify everything is present according to the included parts list.
Before filling the water tank, ensure the humidifier is unplugged. Locate the tank opening and follow the filling instructions – typically using cool, distilled water is recommended. Once filled, securely replace the tank, ensuring a proper seal to avoid leaks.
Position the humidifier to allow for adequate airflow around the unit.
Filling the Water Tank
Honeywell humidifiers require proper water tank filling for optimal performance. Always unplug the unit before handling the tank. Locate the designated water tank opening, often a removable reservoir or a direct-fill port.
It’s highly recommended to use cool, distilled water to minimize mineral buildup and prolong the humidifier’s lifespan. Avoid using hot water, as it can damage internal components. Carefully pour water into the tank, avoiding overfilling – a maximum fill line is usually indicated.
Securely replace the water tank, ensuring a tight seal to prevent leaks during operation. Improperly seated tanks can lead to water damage.
Adjusting Humidity Levels (Humidistat)
Honeywell humidifiers often feature a built-in humidistat, allowing precise control over room humidity. The humidistat displays the current humidity level and allows you to set a desired target. Use the control buttons – typically labeled “+” and “-” or similar – to increase or decrease the target humidity.
A comfortable humidity level generally falls between 30-50%. Starting at a lower setting and gradually increasing it is advisable. Monitor the room’s humidity using a separate hygrometer for accurate readings.
Some models offer automatic humidity control, maintaining the set level without manual adjustments. Refer to your specific model’s instructions for detailed humidistat operation.
Powering On and Initial Operation
Before powering on your Honeywell humidifier, ensure the water tank is properly filled and securely placed on the base. Connect the humidifier to a grounded electrical outlet. Most models have a simple power button to initiate operation. Some advanced models may feature multiple settings, such as low, medium, and high mist output;
Upon initial startup, allow the humidifier a few minutes to begin producing visible mist. It’s normal for a slight delay to occur as the wick or ultrasonic transducer becomes saturated. Observe the mist output to confirm proper function.
Familiarize yourself with the control panel and indicator lights to understand the humidifier’s status.
Maintenance and Cleaning
Regular maintenance is crucial for optimal performance and longevity of your Honeywell humidifier. Consistent cleaning prevents mineral buildup and bacterial growth. Empty and thoroughly dry the water tank daily to inhibit microbial growth. Weekly, disinfect the tank with a diluted bleach solution (follow manufacturer’s instructions carefully), rinsing completely afterward.
The humidifier base should also be cleaned weekly, removing any visible debris or scale. Depending on your water hardness, descaling may be necessary monthly to remove mineral deposits. Refer to the descaling section for detailed instructions.

Always unplug the humidifier before any cleaning procedure.
Filter Replacement (If Applicable)
Certain Honeywell humidifier models utilize filters to remove impurities from the water, extending the humidifier’s lifespan and improving air quality. Filter replacement frequency depends on water hardness and usage, typically every 1-3 months. Check your specific model’s manual for recommended intervals.
To replace the filter, first, unplug the humidifier. Locate the filter access panel, usually on the base or side. Remove the old filter and dispose of it properly. Insert the new filter, ensuring it’s securely in place. Some filters require rinsing before initial use – consult the filter packaging.
Using a genuine Honeywell replacement filter ensures optimal performance.
Cleaning the Water Tank
Regularly cleaning your Honeywell humidifier’s water tank is crucial to prevent bacterial growth and maintain optimal performance. Empty any remaining water and unplug the unit before cleaning. Use a mild detergent and warm water, or a solution of white vinegar and water (1:1 ratio).
Scrub the tank thoroughly with a soft brush, paying attention to corners and crevices where buildup can occur. Rinse the tank completely with clean water until all traces of detergent or vinegar are gone. Allow the tank to air dry completely before reassembling and using the humidifier.
Cleaning weekly is recommended, especially with hard water.
Descaling to Remove Mineral Buildup
Mineral buildup from hard water can reduce your Honeywell humidifier’s efficiency and lifespan. Descaling removes these deposits. Turn off and unplug the humidifier. Refer to your model’s specific instructions, but generally, a solution of white vinegar and water (equal parts) is effective.
Pour the solution into the water tank and let it sit for at least 30 minutes, or longer for significant buildup. Run the humidifier with the solution for about 15-20 minutes to circulate it through the system.
Empty the tank and rinse thoroughly with clean water multiple times until the vinegar smell is gone. Repeat if necessary.
Cleaning the Humidifier Base
Regularly cleaning the humidifier base prevents mold and bacteria growth, ensuring healthy air. First, disconnect the humidifier from power. Empty any remaining water from the base. Use a soft cloth dampened with mild soap and water to wipe down all interior and exterior surfaces.
Pay close attention to crevices and areas where mineral deposits may accumulate. For stubborn buildup, a solution of white vinegar and water can be used, followed by a thorough rinsing with clean water.
Ensure the base is completely dry before reassembling and using the humidifier. Avoid abrasive cleaners, as they can damage the plastic.
Troubleshooting Common Issues
Humidifier Not Turning On: Check the power cord connection and ensure the outlet is functioning. Verify the humidistat is set to an appropriate humidity level. If issues persist, consult the full manual for reset instructions.
Low Mist Output: Clean the humidifier thoroughly, focusing on the ultrasonic transducer (if applicable) and water tank. Ensure the fan is unobstructed. Mineral buildup can significantly reduce mist production.
Noisy Operation: Confirm the humidifier is placed on a level surface. Check for any loose parts or vibrations. Some models have adjustable fan speeds to reduce noise.
Water Leaks: Inspect the water tank for cracks or damage. Ensure a proper seal between the tank and base. Avoid overfilling the tank.
Humidifier Not Turning On
If your Honeywell humidifier fails to power on, begin by verifying the power cord is securely plugged into both the humidifier and a functioning electrical outlet. Test the outlet with another device to confirm it’s providing power. Next, examine the humidistat setting; it must be set above the current room humidity level for the unit to activate.
Some models feature a reset button or power switch located on the base – consult your specific model’s manual for its location. Ensure all components are correctly assembled, as a misaligned tank or base can prevent operation. If the problem continues, a blown fuse (if applicable) might be the cause.
Low Mist Output
Experiencing reduced mist output from your Honeywell humidifier? First, check the water level; it must be sufficient for proper operation. Ensure the tank is correctly seated on the base, establishing a secure connection. Inspect the wick filter (if your model uses one) – a clogged or dirty filter significantly restricts airflow and mist production; replacement is often necessary.
Mineral buildup can also impede mist output. Descaling the humidifier regularly, as outlined in the maintenance section, is crucial. Verify the fan is functioning correctly; a weak or stalled fan will diminish mist dispersal. Finally, confirm the humidistat isn’t set too low, limiting the humidifier’s activity.
Noisy Operation
If your Honeywell humidifier is excessively noisy, several factors could be the cause. Ensure the unit is placed on a level surface; vibrations can amplify noise. Check for any loose parts or components within the humidifier base – tighten screws if necessary. A low water level can sometimes cause gurgling or rattling sounds; refill the tank to the appropriate level.
Mineral buildup can also contribute to noise. Descaling the humidifier regularly will help minimize this. For ultrasonic models, verify the transducer isn’t damaged. If the fan is the source of the noise, it may require cleaning or, in some cases, replacement. Consistent, loud noises warrant further investigation or contacting customer support.
Water Leaks
Discovering water leaks from your Honeywell humidifier can be concerning. First, inspect the water tank for cracks or damage, and ensure it’s properly seated on the base. Check the fill opening and cap for a secure fit. Examine the tubing connecting to the water tank and base for any signs of disconnection or punctures.
Mineral buildup can sometimes cause leaks around seals. Regular descaling is crucial. If the leak originates from the humidifier base, inspect the internal components for cracks or loose connections. Avoid overfilling the tank, as this can lead to overflow. If leaks persist after these checks, discontinue use and contact Honeywell customer support for assistance.

Safety Precautions
Prioritize safety when operating your Honeywell humidifier. Always unplug the unit before cleaning or filling to prevent electrical shock. Use distilled or demineralized water to minimize mineral buildup and prolong the humidifier’s life, reducing potential hazards. Avoid using additives, as they can damage the unit and release harmful substances.
Ensure proper placement, away from furniture and walls, to prevent moisture damage. Regularly inspect the power cord for any signs of wear or damage. Never operate the humidifier with a damaged cord or plug. Keep the humidifier out of reach of children and pets. Follow all warnings and instructions outlined in this manual for safe and effective operation.
Electrical Safety
Honeywell humidifiers operate on standard household electricity; therefore, strict adherence to electrical safety guidelines is crucial. Always ensure the voltage indicated on the humidifier matches your household supply. Never use an extension cord unless absolutely necessary, and if so, select one rated for the humidifier’s wattage.
Avoid operating the humidifier in damp environments, such as bathrooms, to minimize the risk of electrical shock. Regularly inspect the power cord for damage – cracks, fraying, or exposed wires – and discontinue use if any are found. Unplug the unit during cleaning and filling. Do not attempt to repair the humidifier yourself; contact qualified service personnel for any electrical issues.
Water Quality Considerations
Honeywell recommends using distilled or demineralized water in your humidifier to minimize mineral buildup and prolong its lifespan. Tap water contains minerals that can create scale, reducing efficiency and potentially releasing white dust into the air. While tap water can be used, more frequent cleaning and descaling will be required.

Using purified water also helps maintain optimal air quality. Regularly cleaning the water tank, regardless of water type, is essential. Avoid adding any chemicals, essential oils, or other substances to the water, as these can damage the unit and void the warranty. Consider your local water hardness when determining a cleaning schedule.
Proper Humidifier Placement
Honeywell humidifiers should be placed on a flat, stable surface to prevent tipping and potential water damage. Avoid positioning the unit directly on wood floors or furniture, using a protective mat instead. Ensure adequate ventilation around the humidifier, allowing for proper airflow and preventing moisture buildup.
Keep the humidifier away from walls and furniture to avoid condensation. For whole-house humidifiers integrated with your furnace, follow the installation instructions carefully. Do not obstruct the mist outlet. Positioning near doorways or air vents can help distribute humidity more effectively throughout the room or home. Avoid areas with high traffic to prevent accidental damage.
Replacement Parts and Accessories
Honeywell offers a range of replacement parts and accessories to maintain optimal humidifier performance. Key replacements include filters – crucial for cool mist models – and humidifier heads for ultrasonic units like the Zeova series. Finding the correct filter is essential; utilize the Honeywell parts finder with your specific model number.

Humidistat compatibility should be verified when replacing controls. Additional accessories, such as descaling solutions, are available to remove mineral buildup and prolong the humidifier’s lifespan. Regularly checking and replacing worn parts ensures efficient operation and consistent humidity levels. Explore available options through authorized retailers or the Honeywell Home website.
Finding the Right Replacement Filter
Selecting the correct replacement filter for your Honeywell humidifier is vital for maintaining air quality and humidifier efficiency. Honeywell humidifier models utilize various filter types, so referencing your humidifier’s model number is the first step. Utilize the Honeywell Home website’s parts finder tool, inputting your model to identify compatible filters.
Filters remove minerals and impurities from the water, preventing white dust and ensuring clean mist output. Regularly replacing filters – typically every 1-3 months, depending on usage – prevents bacterial growth and maintains optimal performance. Avoid generic filters; Honeywell-approved filters guarantee a proper fit and effective filtration.
Humidistat Compatibility
Honeywell humidistats are crucial for maintaining desired humidity levels, automatically controlling your humidifier. Compatibility varies significantly between Honeywell humidifier models and humidistats. Whole-house humidifiers often integrate directly with furnace-mounted humidistats, like the HE280D, designed for homes between 2,000-4,000 square feet.
For portable units, ensure the humidistat is specifically designed for your model. Some portable humidifiers feature built-in humidistats, while others require a compatible external unit. Always check the product specifications or Honeywell’s compatibility charts before purchasing a humidistat to guarantee seamless operation and accurate humidity control within your home environment.
Available Accessories
Honeywell offers a range of accessories to enhance your humidifier’s performance and longevity. Replacement filters are essential for maintaining air quality, with options varying by model – ensuring you find the right fit is key. For ultrasonic humidifiers, replacement heads like the Zeova 2.64 Gal/10L accessory can restore optimal mist output after extended use.
Additionally, descaling solutions are available to remove mineral buildup, preventing reduced efficiency and extending the humidifier’s lifespan. While not always necessary, humidistats can be purchased separately for precise humidity control. Always refer to your Honeywell humidifier manual or the Honeywell website to identify compatible accessories for your specific unit.