
Goodman Furnace Manual: A Comprehensive Guide
Goodman furnaces are reliable heating systems, offering efficiency through diverse models and components designed for consistent comfort and performance in your home environment.
Understanding Your Goodman Furnace
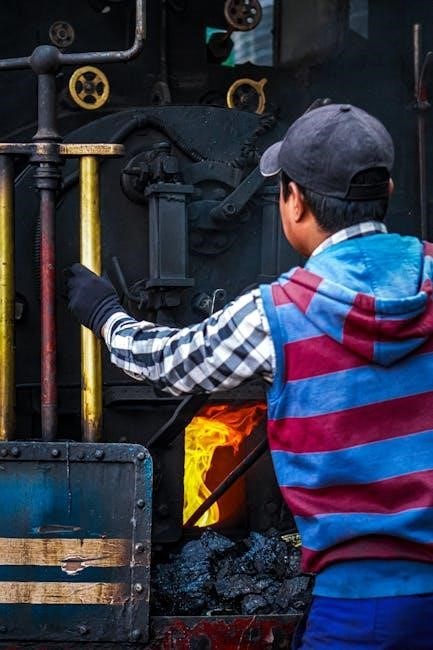
Goodman furnaces represent a significant investment in home comfort, and understanding their operation is crucial for efficient performance and longevity. These systems utilize gas as a primary fuel source, employing a sophisticated process to generate and distribute heat throughout your living space. The core components work in harmony: the inducer motor initiates the process, drawing exhaust gases, while the igniter sparks to ignite the gas, creating a flame.
A blower motor then circulates the warmed air via ductwork. Crucially, condensate produced during combustion is managed through a drain system, and a pressure switch monitors for blockages. Older models (2018 or earlier) lacked a drain-plugged pressure switch, potentially leading to water damage to the inducer motor due to gasket degradation from acidic condensate. Familiarizing yourself with these elements empowers you to identify potential issues and maintain optimal functionality.
Goodman Furnace Overview
Goodman furnaces are widely recognized for their dependability and cost-effectiveness, serving as a cornerstone of home heating systems for many households. Available in a spectrum of models – from single-stage to variable-speed – they cater to diverse heating needs and budgets. Key features often include high-efficiency burners, durable heat exchangers, and robust blower motors designed for consistent airflow.
Modern Goodman furnaces incorporate safety features like blocked drain pressure switches, which halt operation if condensate drainage is obstructed, preventing potential water damage. Understanding the specific model you own is vital, as older units (pre-2018) may lack this crucial safety mechanism. Regular maintenance, including filter replacements and annual inspections, is paramount to maximizing efficiency and extending the lifespan of your Goodman furnace.
Common Goodman Furnace Models
Goodman offers a diverse range of furnace models to suit varying needs. The GSX16 is a popular single-stage model known for its affordability and reliability. For enhanced comfort and efficiency, the GMVC95 offers modulating capabilities and a 95% AFUE rating. The GSC16 is a two-stage furnace providing a balance between efficiency and cost.
More advanced options include the GVZC98, a high-efficiency, variable-speed model delivering exceptional comfort and energy savings. Identifying your specific model number – typically found on the unit’s data plate – is crucial for accessing the correct parts and service information. Knowing the year of manufacture is also helpful, particularly regarding features like the blocked drain pressure switch, common in newer models but absent in some older Goodman furnaces.
Safety Precautions
Goodman furnace repair involves inherent risks; always prioritize safety. Before any maintenance or repair, disconnect the power supply at the breaker box to prevent electrical shock. Gas connections require extreme caution – never attempt repairs if you smell gas, and always use a gas leak detector.
Proper ventilation is crucial when working with combustion appliances. Be mindful of hot surfaces and sharp edges within the furnace. Wear appropriate personal protective equipment, including gloves and eye protection. If you are uncomfortable or lack experience, always consult a qualified HVAC technician. Water damage near the control board presents an electrical hazard; ensure complete dryness before restoring power. Ignoring these precautions can lead to serious injury or property damage.
Troubleshooting Common Issues
Common Goodman furnace problems include short cycling, blocked drain issues, water damage affecting the control board, and inducer motor malfunctions requiring careful diagnosis.
Short Cycling Problems
Short cycling, where the furnace rapidly turns on and off, is a frequent issue with Goodman furnaces. This manifests as the inducer running briefly, the igniter lighting, heat being produced for a short duration, then shutting down before reaching the set temperature. The cycle then repeats quickly. Several factors can contribute to this. A dirty air filter restricts airflow, causing overheating and triggering the safety switch.
Another cause is a failing flame sensor, unable to consistently detect the flame, leading to premature shutdown. Condensate drain blockages, particularly in older models lacking a drain pressure switch, can allow water to enter the inducer motor and potentially damage the control board. Inspect the condensate drain line for obstructions and ensure proper drainage. Finally, a malfunctioning thermostat or gas valve could also be responsible for this disruptive heating pattern, requiring professional evaluation.
Blocked Drain Pressure Switch Issues
A blocked drain pressure switch is a common safety feature in Goodman furnaces designed to prevent water damage. When the condensate drain line becomes clogged, water backs up into the collector box. This triggers the pressure switch, shutting down the furnace to avoid water entering sensitive components. Older Goodman models (2018 and earlier) often lacked this switch, leading to water directly entering the inducer motor.
The acidity of the condensate water degrades the gasket between the inducer motor and collector box, causing leaks. Look for water marks around the inducer motor relay on the control board. Addressing this requires cleaning the drain line, replacing the gasket, and potentially replacing the control board if damaged. A manufacturing flaw in the 90-degree elbow connecting the inducer to the flue pipe can also contribute to condensate draining back into the system.
Water Damage to Control Board
Water damage to the control board is a frequent consequence of blocked condensate drains in Goodman furnaces, particularly in older models. When the drain is clogged, water overflows from the collector box and can drip directly onto the board, specifically near the inducer motor relay. This corrosion can cause intermittent or complete failure of the furnace.
Identifying water damage involves a careful visual inspection for watermarks and corrosion around the components. Even small amounts of water can cause significant damage due to the acidity of the condensate. Repair often necessitates replacing the control board, alongside addressing the root cause – the blocked drain. Replacing the gasket between the inducer motor and collector box is also crucial to prevent future leaks and protect the board.
Inducer Motor Problems
Goodman furnace inducer motor issues often stem from condensate drain problems, leading to water intrusion. Older models (2018 and earlier) lacked drain pressure switches, allowing water to accumulate and seep into the motor itself. The gasket between the motor and collector box degrades with acidic condensate exposure, causing leaks.
Symptoms include the inducer running for short periods, followed by immediate restarts – a “chattering” effect. This is frequently linked to the blocked drain pressure switch attempting to shut down the system. Inspect for watermarks around the motor and control board. Repair may involve replacing the inducer motor, the gasket, cleaning the drain line, and verifying proper condensate drainage to prevent recurrence. A faulty inducer can prevent ignition and shut down the furnace.

Component Breakdown & Maintenance
Regular inspection and upkeep of key components—like the inducer motor, flame sensor, gas valve, and blower—ensure optimal Goodman furnace performance and longevity.
Inducer Motor & Assembly
The inducer motor is a critical component responsible for venting combustion gases safely from your Goodman furnace. It initiates the combustion process by drawing air through the burner assembly and expelling exhaust. A common issue, particularly in older models (2018 and earlier), involves condensate draining back into the inducer motor itself. This occurs due to a flawed 90-degree rubber elbow connecting the inducer to the flue pipe, possessing excess internal rubber.
Over time, acidic condensate degrades the gasket between the motor and collector box, leading to leaks. Water can drip onto the control board, potentially damaging the inducer motor relay. Regular inspection for watermarks around the board and motor is crucial. Replacement of both the gasket and a potentially damaged control board may be necessary, alongside ensuring a clear condensate drain line to prevent future issues. Proper assembly and sealing are vital for safe and efficient operation.
Flame Sensor & Ignition System
The flame sensor is a vital safety component within your Goodman furnace, continuously monitoring for the presence of a flame during operation. It signals the gas valve to remain open only when a flame is detected, preventing dangerous gas buildup. The ignition system, working in tandem, initiates the combustion process. Issues can arise if the flame sensor becomes dirty or corroded, leading to intermittent or complete furnace failure.
Cleaning or replacing the flame sensor is often a straightforward repair. A dirty sensor may not accurately detect the flame, causing the furnace to shut down prematurely. Proper diagnosis is key; a multimeter can verify sensor functionality. Ensure the sensor is clean and properly positioned within the flame path for optimal performance and safe operation of your heating system. Regular checks contribute to reliable furnace function.
Gas Valve & Regulator
The gas valve and regulator are critical components controlling the flow of natural gas or propane to the burner, ensuring safe and efficient combustion within your Goodman furnace. The regulator maintains consistent gas pressure, vital for optimal performance. Diagnosing gas valve issues requires caution and expertise, as improper handling can be dangerous. Symptoms of a faulty gas valve include a lack of heat, yellow flames, or gas odors.
If you suspect a gas valve problem, immediately shut off the gas supply and contact a qualified HVAC technician. Never attempt repairs yourself unless you are professionally trained. Technicians will use specialized tools to test the valve’s operation and identify any leaks or malfunctions. Replacement may be necessary, and proper adjustment is crucial for safe and efficient furnace operation.
Blower Motor & Fan
The blower motor and fan are essential for distributing heated air throughout your home via the ductwork. The blower motor powers the fan, which circulates air across the heat exchanger, delivering warmth to your living spaces. Common issues include a failing motor, noisy operation, or insufficient airflow. A failing blower motor can cause the furnace to overheat or shut down completely.
Regular maintenance, such as lubricating the motor bearings, can extend its lifespan. If the motor is failing, replacement is often necessary. Technicians will check the motor’s windings, capacitors, and bearings to diagnose the problem. Proper fan blade balance is also crucial for efficient and quiet operation. Addressing blower motor issues promptly ensures consistent and comfortable heating.
Condensate Drain System
The condensate drain system is vital for removing acidic water produced during the combustion process in high-efficiency furnaces. A blockage in this system is a frequent issue, often triggering the blocked drain pressure switch and shutting down the furnace. Water can back up into the inducer motor, degrading the gasket between the motor and collector box due to acidity.
Regularly inspect and clear the condensate drain line to prevent clogs. Flushing with a vinegar solution can dissolve buildup. Look for water marks around the inducer motor relay and the control board, indicating potential water damage. Replacing the gasket and cleaning the drain are often necessary steps. Addressing condensate drain issues promptly prevents further damage and ensures efficient furnace operation.

Detailed Repair Procedures
Precise steps are crucial for fixing Goodman furnaces, including inducer motor replacement, flame sensor cleaning, gas valve diagnosis, and condensate drain blockage resolution.
Replacing the Inducer Motor
Replacing the inducer motor requires careful disconnection of wiring and gas piping, noting their original positions for correct reassembly. Begin by shutting off power to the furnace at the breaker. Access the inducer motor, often located near the burner assembly, and disconnect the electrical connections, carefully labeling each wire. Detach the vent pipe and any condensate drain lines connected to the motor.
Remove the mounting screws securing the inducer motor to the furnace. Install the new inducer motor, ensuring the gasket between the motor and collector box is in good condition – a common failure point due to acidic condensate. Reconnect the vent pipe, condensate drain, and electrical wiring, referencing your labels. Finally, restore power and test the furnace operation, verifying proper inducer motor function and checking for any gas leaks.
Cleaning or Replacing the Flame Sensor
A faulty flame sensor is a frequent cause of furnace issues, preventing the gas valve from staying open. Begin by disconnecting power to the furnace. Locate the flame sensor – a small metal rod positioned near the burner – and carefully remove it. Inspect the sensor for soot or corrosion; a dirty sensor can’t accurately detect the flame.
Gently clean the flame sensor with fine steel wool or sandpaper, removing any buildup. Reinstall the cleaned sensor and restore power to test. If cleaning doesn’t resolve the issue, the sensor may be defective and require replacement. Ensure the replacement sensor is compatible with your Goodman furnace model. Proper flame sensor function is crucial for safe and efficient furnace operation.
Diagnosing and Fixing Gas Valve Issues
Gas valve problems can manifest as no heat, inconsistent heating, or a gas odor. Never attempt repairs if you smell gas – immediately contact your gas company! If no odor is present, begin by verifying the gas supply is turned on. A multimeter can test the valve’s voltage, ensuring it receives power. Inspect the valve for physical damage or corrosion.
A faulty gas valve often requires replacement, which is best left to a qualified HVAC technician due to the inherent dangers of working with gas lines. They will ensure proper connections and leak testing. Before any work, disconnect power and the gas supply. Addressing gas valve issues promptly is vital for safety and maintaining your furnace’s heating capability.
Addressing Blower Motor Failures
Blower motor failures present as no airflow, weak airflow, or unusual noises. First, check the blower motor capacitor – a common point of failure. Use a capacitor tester to verify its functionality; a bulging or leaking capacitor needs replacement. Inspect the motor windings with a multimeter for continuity, indicating a potential short or open circuit.
If the motor itself is faulty, replacement is usually necessary. Ensure the new motor matches the original specifications (horsepower, voltage, RPM). Disconnect power before any work. Lubricate the motor bearings if accessible. A failing blower motor can significantly impact heating distribution, so prompt attention is crucial for maintaining comfortable temperatures throughout your home.
Resolving Condensate Drain Blockages
Condensate drain blockages are frequent issues, often triggering the blocked drain pressure switch. Begin by locating the condensate drain line – typically a PVC pipe exiting the furnace. Disconnect the line and check for obstructions like algae, debris, or frozen water. A wet/dry vacuum can effectively clear blockages.
Inspect the 90-degree elbow connecting the inducer to the flue pipe; excess rubber inside can cause drainage issues. Consider replacing it. Regularly flushing the drain line with a cup of vinegar can prevent future buildup. Ensure the condensate trap is functioning correctly, maintaining a water seal to prevent backflow. Addressing these blockages restores proper drainage and prevents water damage.
Preventative Maintenance
Regular filter changes, annual inspections, burner cleaning, and gas connection checks are crucial for maintaining optimal furnace performance and extending its operational lifespan.
Filter Replacement Schedule
Maintaining a consistent filter replacement schedule is paramount for optimal Goodman furnace performance and longevity. The frequency depends on several factors, including household size, pet ownership, and air quality. A standard 1-inch filter should ideally be checked monthly and replaced every 1-3 months.
Homes with pets or allergy sufferers may require more frequent changes – potentially every 30 days. Thicker, 4- or 5-inch filters offer extended life, lasting 6-12 months, but still necessitate periodic inspection. A dirty filter restricts airflow, causing the furnace to work harder, leading to increased energy bills and potential component failure.
Always note the filter size specified in your furnace manual and use the correct replacement. Regularly inspecting the filter allows you to proactively address any buildup and ensure efficient operation. Ignoring filter maintenance can void your furnace warranty, so diligence is key!
Annual Furnace Inspection
Scheduling an annual professional furnace inspection is crucial for ensuring safe and efficient operation of your Goodman system. A qualified HVAC technician will thoroughly assess all components, including the burner assembly, heat exchanger, blower motor, and electrical connections. This preventative measure identifies potential issues before they escalate into costly repairs or safety hazards.
The inspection includes checking for gas leaks, carbon monoxide levels, and proper ventilation. Technicians will also evaluate the condensate drain system for blockages and ensure the flame sensor is functioning correctly. A clean and well-maintained furnace operates more efficiently, reducing energy consumption and extending its lifespan.
Don’t delay – an annual inspection provides peace of mind and safeguards your investment, maintaining optimal heating performance throughout the colder months. It’s a small price to pay for long-term reliability.
Cleaning the Burner Assembly
Regularly cleaning the burner assembly is vital for maintaining optimal combustion and furnace efficiency. Over time, dust, debris, and carbon buildup can accumulate, hindering proper ignition and reducing heating performance. Before attempting any cleaning, always disconnect the power supply to the furnace at the breaker box to prevent electrical shock.
Using a vacuum cleaner with a brush attachment, carefully remove loose debris from around the burners and the burner manifold. A soft brush can dislodge stubborn particles. Inspect the burners for any signs of corrosion or damage, and replace them if necessary. Ensure the burner ports are clear and unobstructed for even flame distribution.
A clean burner assembly ensures safe and efficient operation, maximizing heat output and minimizing energy waste. Remember to reassemble everything carefully and restore power only after confirming all components are correctly positioned.
Checking Gas Connections
Prioritizing safety, regularly inspect all gas connections for leaks. Always disconnect power to the furnace before inspecting gas lines. Prepare a solution of soapy water and apply it to all gas pipe connections, including those at the gas valve, regulator, and burner manifold.
Watch closely for bubbles forming, indicating a leak; If a leak is detected, immediately shut off the gas supply at the main valve and contact a qualified HVAC technician. Do not attempt to repair gas leaks yourself. Ensure all connections are tight, but avoid over-tightening, which can damage the fittings.
Properly secured gas connections are crucial for safe and efficient furnace operation, preventing dangerous gas buildup and ensuring reliable heating performance. Annual professional inspection is highly recommended.

Advanced Diagnostics
Utilizing a multimeter and understanding error codes are vital for pinpointing complex issues, alongside careful inspection of wiring for potential faults and disruptions.
Using a Multimeter for Testing
A multimeter is an indispensable tool for diagnosing Goodman furnace problems, allowing you to check voltage, resistance, and continuity in various components. Before starting, always disconnect power to the furnace at the breaker. Begin by testing the input voltage to the control board to ensure it’s receiving the correct power. Then, check the voltage across the inducer motor to verify it’s getting power when it should be running.
Resistance testing can help identify faulty components like the flame sensor or heating elements. Disconnect the component and measure its resistance; compare the reading to the manufacturer’s specifications. Continuity testing confirms a complete electrical path, useful for checking wiring connections and switches. Carefully probe each connection to ensure a solid link. Remember to exercise extreme caution when working with electrical components and always refer to the Goodman furnace wiring diagram for accurate testing points.
Understanding Error Codes
Goodman furnaces utilize a sophisticated error code system to pinpoint malfunctions, displayed on the furnace’s control board or through flashing LED indicators. These codes aren’t universal; referencing your specific model’s technical manual is crucial for accurate interpretation. Common codes relate to issues like flame rollout, blocked vent, high limit switch activation, or inducer motor failures. A “12” code often indicates a flame sensing issue, while a “15” might signal a blocked condensate drain.
Don’t simply replace parts based on the code alone; further diagnostics are essential. Error codes provide a starting point, guiding you towards the problematic area. Always verify the code’s meaning in the manual before proceeding, and remember that multiple codes can appear simultaneously, indicating interconnected problems. Documenting the code and any accompanying symptoms aids in effective troubleshooting.
Identifying Wiring Issues
Goodman furnace wiring, while generally standardized, requires careful inspection for loose connections, corrosion, or damaged insulation. Begin by disconnecting power before any examination. Visually trace wires from the control board to components like the inducer motor, gas valve, and flame sensor. Look for burnt or frayed wires, a common sign of electrical stress. Use a multimeter to test continuity, ensuring a complete circuit where expected.
Pay close attention to wire connectors; these can loosen over time due to vibration. A wiring diagram, usually located inside the furnace access panel, is invaluable for identifying correct connections. Incorrect wiring can cause significant damage. If unsure, consult a qualified HVAC technician; electrical work can be dangerous.
