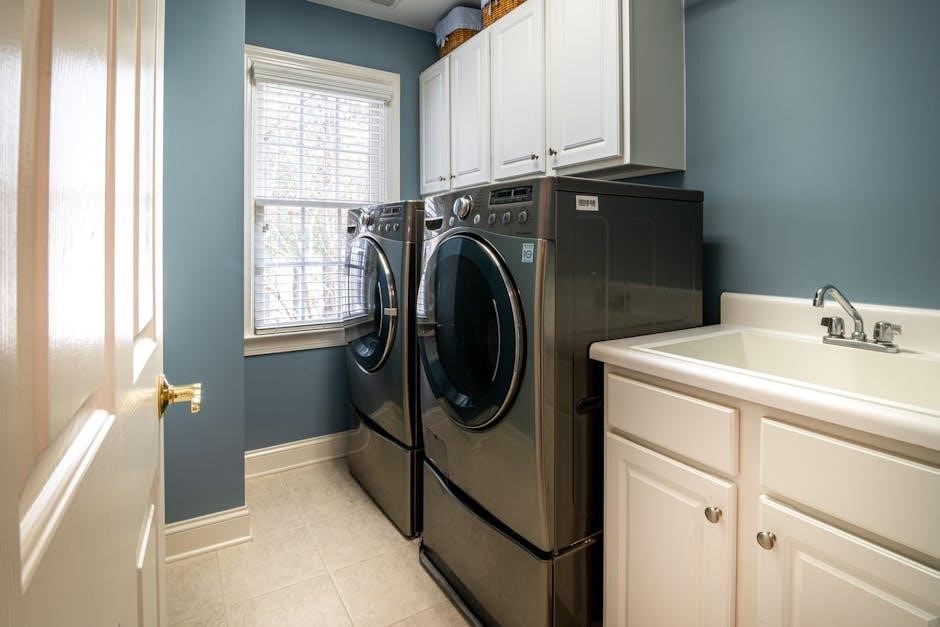
Kenmore 700 Series Dryer Manual: An Overview
This manual provides essential guidance for operating and maintaining your Kenmore 700 Series dryer‚ ensuring optimal performance and longevity.
Identifying Your Specific 700 Series Model
Locating your dryer’s precise model number is crucial for accessing the correct documentation and replacement parts. The model number is typically found on a label inside the dryer door frame‚ or on the back of the appliance. This alphanumeric code distinguishes your specific 700 Series configuration.
Kenmore utilized various sub-models within the 700 Series‚ each with potentially unique features or component variations. Having the complete model number allows you to download the exact manual tailored to your dryer. It also ensures compatibility when ordering replacement belts‚ thermal fuses‚ or other necessary parts. Without it‚ troubleshooting and repairs can become significantly more challenging‚ potentially leading to incorrect parts or procedures.
Where to Find the Official Manual Online
The official Kenmore 700 Series dryer manual is readily available online through several resources. A primary source is the Sears PartsDirect website (searspartsdirect.com)‚ as Kenmore appliances were historically sold through Sears. Enter your specific model number into their search bar to locate the corresponding manual in PDF format.
Alternatively‚ ManualsLib (manualslib.com) and similar online manual databases often host archived versions of appliance manuals‚ including Kenmore models. Ensure the manual matches your exact model number for accuracy. These resources provide free access to detailed instructions‚ diagrams‚ and troubleshooting guides‚ eliminating the need to purchase a physical copy.

Understanding Dryer Controls & Features
Familiarize yourself with the Kenmore 700 Series dryer’s intuitive controls‚ including cycle selections‚ temperature settings‚ and specialized features for optimal results.
Control Panel Breakdown: Knobs & Buttons
The Kenmore 700 Series dryer’s control panel is designed for user-friendly operation. The primary knob typically selects the drying cycle – options include Normal‚ Delicate‚ Timed Dry‚ and more specialized settings.
Buttons surrounding the knob activate additional features like Wrinkle Shield‚ Sanitize‚ or adjust temperature levels. A Power button initiates or terminates the drying process.
Start/Pause button controls the cycle. Indicator lights clearly display the selected cycle‚ remaining time‚ and any active features. Some models feature a digital display for precise time remaining and error code notifications. Understanding each button’s function is crucial for customizing your drying experience and achieving the best results for various fabric types.
Cycle Selection Guide: Normal‚ Delicate‚ Timed Dry
The Kenmore 700 Series dryer offers a variety of cycles to suit different needs. The ‘Normal’ cycle is ideal for everyday cottons and linens‚ utilizing medium-high heat for efficient drying. ‘Delicate’ employs low heat‚ perfect for fragile fabrics like lingerie or synthetics‚ preventing damage.
‘Timed Dry’ allows you to manually set the drying time‚ useful for small loads or items requiring specific drying durations. Additional cycles may include ‘Bulky’‚ for bedding‚ or ‘Permanent Press’‚ minimizing wrinkles;
Always consult garment care labels before selecting a cycle. Incorrect cycle selection can lead to shrinking‚ fading‚ or damage to your clothes.
Temperature Settings: High‚ Medium‚ Low‚ Air Dry
Your Kenmore 700 Series dryer provides precise temperature control for optimal fabric care. ‘High’ heat is best for durable cottons and towels‚ ensuring quick drying. ‘Medium’ is suitable for most everyday items‚ balancing drying time and fabric protection.
‘Low’ heat is recommended for delicate fabrics and items prone to shrinking‚ minimizing damage. The ‘Air Dry’ setting offers no heat‚ ideal for refreshing clothes or drying items that shouldn’t be exposed to heat‚ like items with embellishments.
Always check garment care labels to determine the appropriate temperature setting.
Special Features: Wrinkle Shield‚ Sanitize Cycle
The Kenmore 700 Series dryer boasts features enhancing convenience and garment care. ‘Wrinkle Shield’ periodically tumbles clothes without heat after the cycle ends‚ preventing creases and minimizing ironing needs – perfect for busy schedules.
The ‘Sanitize’ cycle utilizes higher temperatures to eliminate bacteria and germs‚ ideal for bedding‚ towels‚ and baby clothes‚ promoting hygiene. This cycle offers peace of mind‚ especially for sensitive items.
Refer to the full manual for specific cycle durations and recommended load sizes when utilizing these specialized features.

Troubleshooting Common Issues
This section details solutions for frequent problems like the dryer not starting‚ heating‚ or stopping mid-cycle‚ ensuring quick resolutions.
Dryer Not Starting: Power & Door Switch
If your Kenmore 700 Series dryer isn’t starting‚ first verify it’s receiving power. Check the outlet with another appliance to confirm functionality. Next‚ inspect the dryer’s power cord for any visible damage or loose connections. A tripped circuit breaker or blown fuse should also be investigated and reset or replaced‚ respectively.
Crucially‚ the door switch must be engaged for the dryer to operate. This switch ensures the dryer won’t run with the door open. Carefully examine the door latch and switch mechanism for obstructions or damage. You can often test the switch with a multimeter to confirm its continuity when the door is securely closed. A faulty door switch is a common cause and relatively easy to replace.
Finally‚ consider if the dryer is in a paused state or a cycle hasn’t been selected;
Dryer Not Heating: Heating Element & Thermal Fuse
A dryer failing to heat often points to issues with the heating element or the thermal fuse. Begin by safely accessing the heating element – always disconnect power first! Visually inspect it for breaks or damage. A broken element will require replacement. Use a multimeter to test for continuity; no continuity indicates a failed element.
The thermal fuse is a safety device that cuts power to the heating element if overheating occurs. Locate the thermal fuse (typically near the exhaust vent) and test it for continuity. If it’s blown‚ it indicates an underlying problem causing overheating‚ like a blocked vent. Replacing the fuse alone won’t solve the issue if the root cause isn’t addressed.
Remember to address ventilation issues before replacing components.
Dryer Stops Mid-Cycle: Overload Protection
If your Kenmore 700 Series dryer abruptly stops during a cycle‚ the overload protection system likely tripped. This safety feature prevents motor damage from overheating or excessive load. First‚ always disconnect the dryer from power before investigating.
Overloads can occur from several factors: a heavily loaded drum‚ restricted airflow due to a clogged lint filter or vent‚ or a failing motor component. Check and clean the lint filter and vent thoroughly. Reduce the load size in future cycles.
Allow the dryer to cool completely (30-60 minutes) before attempting to restart it. If the problem persists‚ a motor issue or internal component failure may require professional repair.
Clothes Are Still Wet: Moisture Sensor Problems
If your Kenmore 700 Series dryer consistently leaves clothes damp‚ a malfunctioning moisture sensor is a likely culprit. These sensors detect humidity levels within the drum to determine when clothes are dry‚ automatically ending the cycle.
Sensor issues can stem from several causes: dirty or corroded sensor bars (typically located inside the drum)‚ a faulty sensor‚ or a problem with the dryer’s control board. Always disconnect power before cleaning the sensor bars with rubbing alcohol and a soft cloth.
If cleaning doesn’t resolve the issue‚ the sensor may need replacement. Testing the sensor with a multimeter or seeking professional diagnosis is recommended.
Maintenance & Cleaning
Regular maintenance extends your Kenmore 700 Series dryer’s life and ensures efficient operation. Cleaning lint and the drum is crucial for safety.
Cleaning the Lint Filter: Importance & Procedure
The lint filter is a critical component for safe and efficient dryer operation. A clogged filter restricts airflow‚ leading to longer drying times‚ increased energy consumption‚ and a potential fire hazard. Always clean the lint filter before each load.
To clean‚ simply locate the lint filter – typically inside the dryer door or on top of the dryer cabinet. Remove the filter and use your fingers or a soft brush to gently remove the accumulated lint. Avoid using water or harsh chemicals‚ as these can damage the filter.
Inspect the lint filter housing regularly for any lint buildup. A vacuum cleaner with a hose attachment can be used to remove lint from the housing. A clean lint filter promotes optimal dryer performance and significantly reduces the risk of fire.
Cleaning the Dryer Vent: Preventing Fires
A clean dryer vent is paramount for safety‚ preventing dangerous lint buildup that can cause fires. Restricted airflow also reduces drying efficiency and can damage your Kenmore 700 Series dryer. Inspect and clean the entire vent system at least annually‚ or more frequently with heavy use.
Disconnect the dryer from power before cleaning. Detach the vent hose from both the dryer and the wall. Use a dryer vent cleaning kit – available at most hardware stores – or a vacuum with a long hose attachment to remove lint from the vent.
Ensure the exterior vent opening is clear of obstructions like bird nests or snow. Reconnect the vent hose securely. Regular vent cleaning is a crucial safety measure.
Drum Cleaning: Removing Residue Buildup
Over time‚ fabric softener‚ detergent residue‚ and mineral deposits can accumulate inside your Kenmore 700 Series dryer drum‚ potentially causing stains on clothes and reducing drying performance. Regular drum cleaning helps maintain optimal results and prevents unpleasant odors.
To clean the drum‚ use a dryer drum cleaner specifically designed for this purpose – readily available at most retailers. Alternatively‚ a solution of warm water and white vinegar can be effective. Run an empty cycle on the hottest setting with the cleaner or vinegar solution.
Wipe down the drum interior with a damp cloth after the cycle completes. Repeat this process monthly‚ or as needed‚ to keep your dryer drum fresh and clean.
Exterior Cleaning: Maintaining Appearance
Keeping the exterior of your Kenmore 700 Series dryer clean not only enhances its appearance but also protects the finish from damage. Regular cleaning prevents buildup of dust‚ fingerprints‚ and spills.
To clean the exterior‚ simply wipe down all surfaces with a soft‚ damp cloth. For stubborn stains or grime‚ a mild detergent solution can be used‚ but always test it in an inconspicuous area first. Avoid abrasive cleaners‚ as they can scratch the finish.
Ensure the dryer is unplugged before cleaning. Pay attention to the control panel and door area‚ as these tend to accumulate more dirt. Dry the exterior thoroughly with a clean cloth after cleaning.

Repair & Parts Information
Locating replacement parts and diagrams is crucial for dryer repairs; Always prioritize safety and consult the manual before attempting any fixes.
Common Replacement Parts: Belts‚ Fuses‚ Thermostats
Several components frequently require replacement to maintain optimal dryer function. The dryer belt‚ responsible for rotating the drum‚ often wears out‚ causing a no-turn situation. Thermal fuses are safety devices that blow when overheating occurs‚ preventing fires – a common failure point. Heating element issues lead to no heat‚ necessitating replacement. Thermostats regulate temperature; malfunctioning ones cause inconsistent drying or no heat. Additionally‚ the door switch ensures operation only when the door is securely closed. Regularly inspecting and replacing these parts extends the dryer’s lifespan and ensures safe‚ efficient operation. Always disconnect power before any repair and refer to your model’s parts diagram for correct replacements.
Finding Parts Diagrams for Your Model
Locating the correct parts diagram is crucial for successful repairs. Begin by noting your dryer’s complete model number‚ typically found on a label inside the door or on the back panel. Utilize the official Kenmore website‚ searching by model number to access detailed exploded views. Several third-party appliance parts retailers also host extensive diagrams; websites like RepairClinic and Sears PartsDirect are valuable resources. These diagrams illustrate each component’s location and part number. Always verify the diagram matches your specific 700 Series model to avoid ordering incorrect parts. Diagrams simplify disassembly and reassembly‚ ensuring a smooth repair process.
Safety Precautions When Repairing a Dryer
Prioritize safety when undertaking any dryer repair. Always disconnect the dryer from both power and gas (if applicable) before beginning work. Electrical shock is a serious hazard; never attempt repairs with the dryer plugged in. Wear appropriate safety glasses and gloves to protect against sharp edges and potential irritants. If dealing with gas dryers‚ shut off the gas supply at the valve and verify no gas leaks exist after reconnection. Proper ventilation is essential‚ especially when working with cleaning solvents. Dispose of old parts responsibly. If unsure about any step‚ consult a qualified appliance technician.

Advanced Troubleshooting
Delve into complex issues with error code analysis‚ moisture sensor diagnostics‚ and gas valve checks (gas models) for optimal repair success.
Error Codes & Their Meanings
Kenmore 700 Series dryers utilize error codes to pinpoint specific malfunctions‚ simplifying the troubleshooting process. These codes appear on the display panel‚ offering valuable diagnostic information. A common code‚ “E1‚” often indicates a heating element failure‚ while “E2” suggests a blocked vent or airflow restriction. “E3” typically signals a moisture sensor issue‚ preventing proper drying. “E4” can denote a faulty door switch‚ hindering operation.
Consult your specific model’s manual for a comprehensive list of error codes and their corresponding solutions. Ignoring these codes can lead to further damage or inefficient performance. Always disconnect the dryer from power before attempting any repairs. Referencing the manual ensures accurate diagnosis and safe resolution of the identified problem‚ maximizing the dryer’s lifespan and functionality.
Diagnosing Moisture Sensor Failures
Moisture sensor failures in the Kenmore 700 Series often manifest as clothes remaining damp after a cycle‚ or the dryer running excessively long. Begin by inspecting the sensor bars inside the dryer drum for lint buildup or damage – clean them gently with rubbing alcohol and a soft cloth.
Next‚ check the wiring connections to the sensor; loose or corroded connections can disrupt signal transmission. Use a multimeter to test the sensor’s resistance; a reading outside the manufacturer’s specifications indicates a faulty sensor. Replacement is usually necessary. Remember to disconnect power before any inspection or repair. Accurate diagnosis prevents unnecessary component replacement and restores efficient drying performance.
Checking the Gas Valve (Gas Dryers Only)
For Kenmore 700 Series gas dryers‚ a malfunctioning gas valve can prevent heating. Always disconnect the gas supply and power before inspection! Visually inspect the valve for damage or corrosion. Carefully check the solenoid coil for continuity using a multimeter; a lack of continuity indicates a faulty coil.
Ensure the valve receives proper voltage during a heating cycle. If voltage is present but the valve doesn’t open‚ the valve itself is likely defective and requires replacement. Caution: Gas valve repairs should only be performed by qualified technicians due to the risk of gas leaks and potential hazards. Prioritize safety and professional assistance.
Safety Information
Prioritize safety when using your Kenmore 700 Series dryer; follow all warnings to prevent fires‚ electrical shock‚ and potential injury.
Important Safety Warnings
Before operating your Kenmore 700 Series dryer‚ carefully read all instructions and heed these crucial safety warnings. Always ensure the dryer is properly installed and grounded to prevent electrical hazards. Never operate the dryer if it’s damaged or malfunctioning – disconnect power immediately and contact a qualified technician.
Keep the surrounding area clear of flammable materials like lint‚ paper‚ and gasoline. Do not store or use combustible substances near the dryer. Regularly clean the lint filter before each load to minimize fire risk. Avoid drying items that have been previously exposed to flammable liquids‚ such as cleaning solvents.
Never attempt to repair the dryer yourself unless you are qualified. Improper repairs can lead to dangerous situations. Supervise children when they are near the dryer‚ and do not allow them to play with the controls. Disconnect the power supply before cleaning or performing any maintenance.
Carbon Monoxide Poisoning Prevention (Gas Dryers)
If you own a gas Kenmore 700 Series dryer‚ understanding carbon monoxide (CO) risks is paramount. CO is a colorless‚ odorless gas that can be fatal. Ensure proper ventilation; the dryer must be vented to the outside. Never block or obstruct the vent pipe‚ as this can cause CO to build up inside your home.
Install a CO detector near the dryer area‚ following the manufacturer’s instructions for placement and maintenance. Regularly inspect the vent pipe for any damage or disconnections. If you suspect a gas leak or experience symptoms of CO poisoning – headache‚ dizziness‚ nausea – immediately evacuate the premises and call your gas company or 911.
Annual inspection by a qualified technician is highly recommended to ensure the dryer is functioning safely and efficiently‚ preventing potential CO hazards. Do not operate the dryer if you smell gas.

Warranty Information
Your Kenmore 700 Series dryer is covered by a warranty protecting against defects in materials and workmanship for a specified period.
Understanding Your Kenmore Dryer Warranty
The Kenmore 700 Series dryer warranty typically offers coverage for one year from the date of purchase‚ protecting against manufacturing defects in parts and workmanship. This standard warranty covers components that fail during normal household use. However‚ it’s crucial to review the specific terms and conditions detailed in your warranty documentation‚ as coverage can vary based on the model and purchase location.
Extended warranties are often available for purchase‚ providing additional years of protection beyond the initial one-year period. These extended plans can offer peace of mind‚ covering potential repairs or replacements for a longer duration. The warranty does not cover damage resulting from misuse‚ improper installation‚ accidents‚ or natural disasters; Keep your proof of purchase readily available‚ as it’s required for all warranty claims.
Registering Your Appliance
Registering your Kenmore 700 Series dryer is a simple yet vital step that unlocks several benefits. Registration confirms your ownership and allows Kenmore to notify you of important safety recalls or updates related to your specific model. It also streamlines the warranty claim process should you encounter any issues‚ providing quicker and more efficient service.
You can typically register your appliance online through the Kenmore website‚ using your model number and date of purchase. Alternatively‚ you may find a registration card included with your dryer’s documentation. Keeping your appliance registered ensures you receive timely support and maximizes the value of your Kenmore product.